
It’s Springtime, but only in my head(s).
So, I learned that despite coming off of an assembly line and being nearly identical, valve springs do in fact, need some help to meet spec. Yep, had to use shims on some of the springs.
After a little reading, I learned that the valve spring installed height has to be checked on the head side of things. I have to measure the distance between the valve seat and the underside of the valve spring retainer. There is not a one-size-fits-all approach.
Aluminum heads are relatively soft. They don’t like hardened steel valve springs digging into them.

To protect the head and to keep the spring located properly, valve spring cups are used.
These work great at what they were designed for but they make it a bitch to check installed valve spring height. Ok, maybe not that bad but why stress it when you’ve had something like this in your tool box for nearly 40 years

This is an installed valve spring height micrometer. It makes setting the installed height very easy.
After the heads were cast, they were sent to a machine shop to be made into working cylinder heads. I was able to get ahold of the machine shop before my set was completed and made arrangements for them to perform a simple pocket porting and then assemble the heads with parts I would supply. Basically, by the time I received the heads, they were complete and ready to go.
Because I was working with a complete cylinder head, I had a great starting point for the work I needed to take care of.
Since I was just swapping springs, I figured everything was all set to go but I wanted to go through the steps of checking the installed spring height anyway.
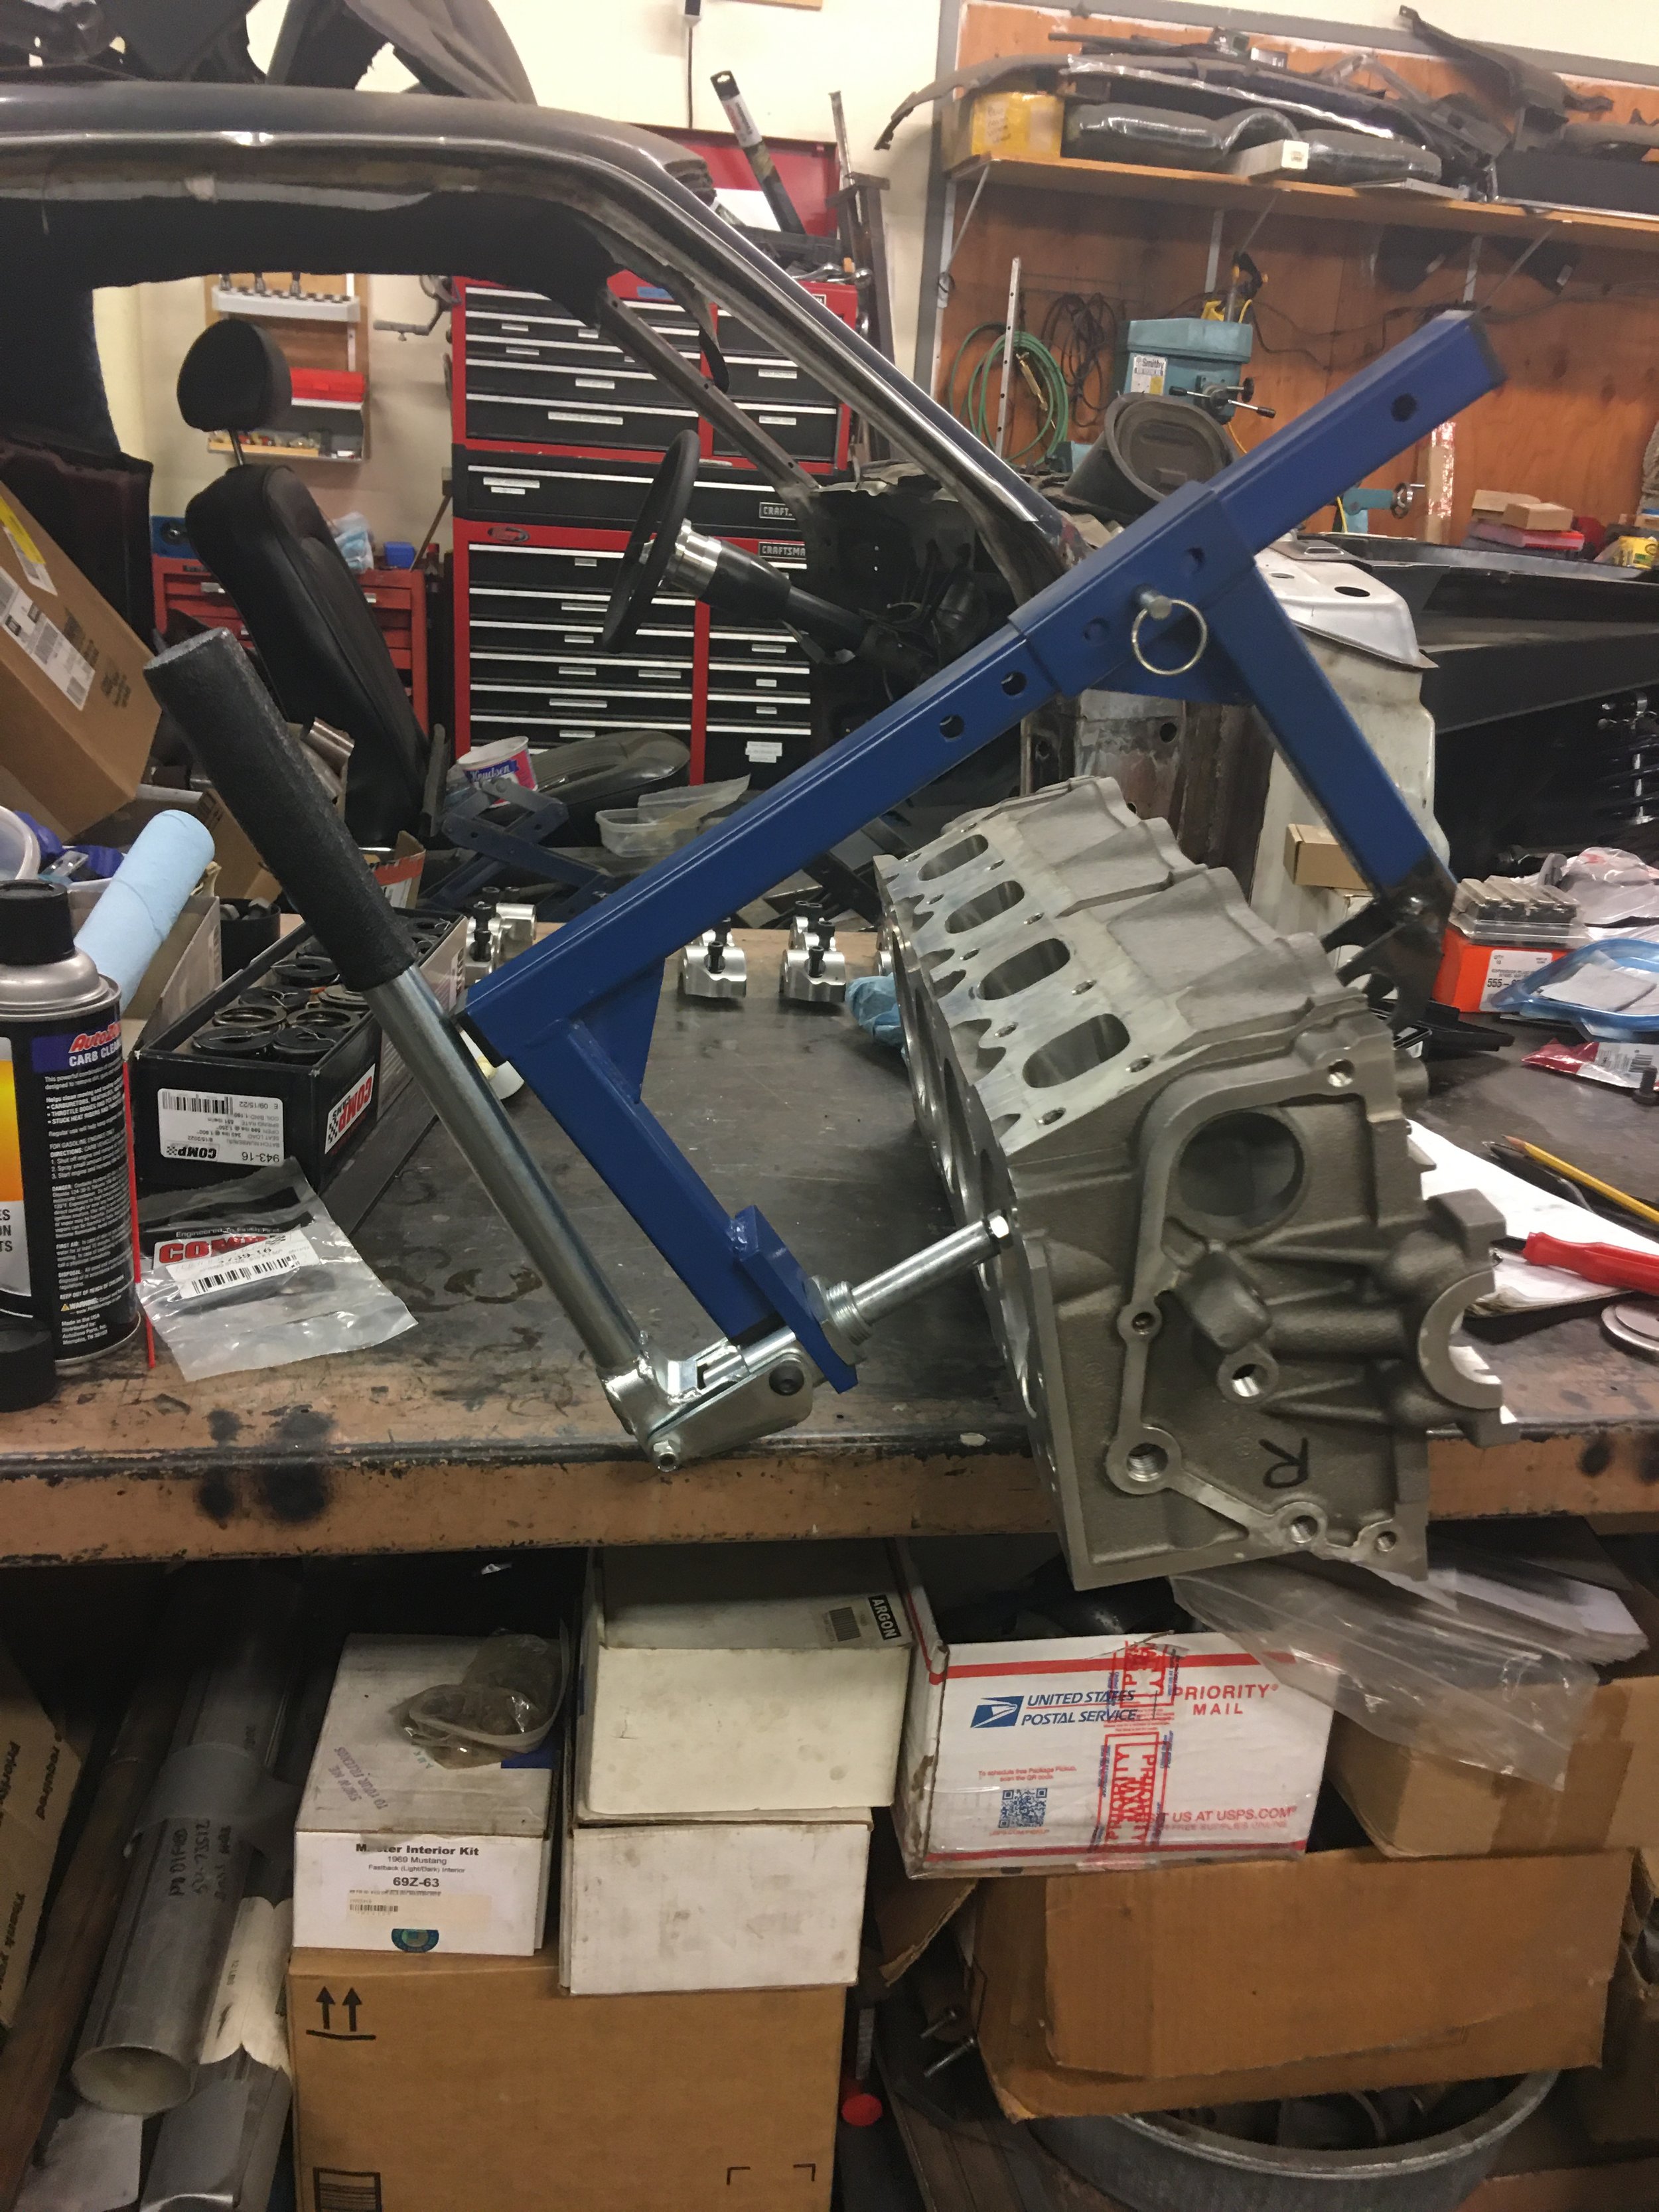
The process started with taking the existing spring out of the head. To do this, I finally got to break out my modified spring compressor.
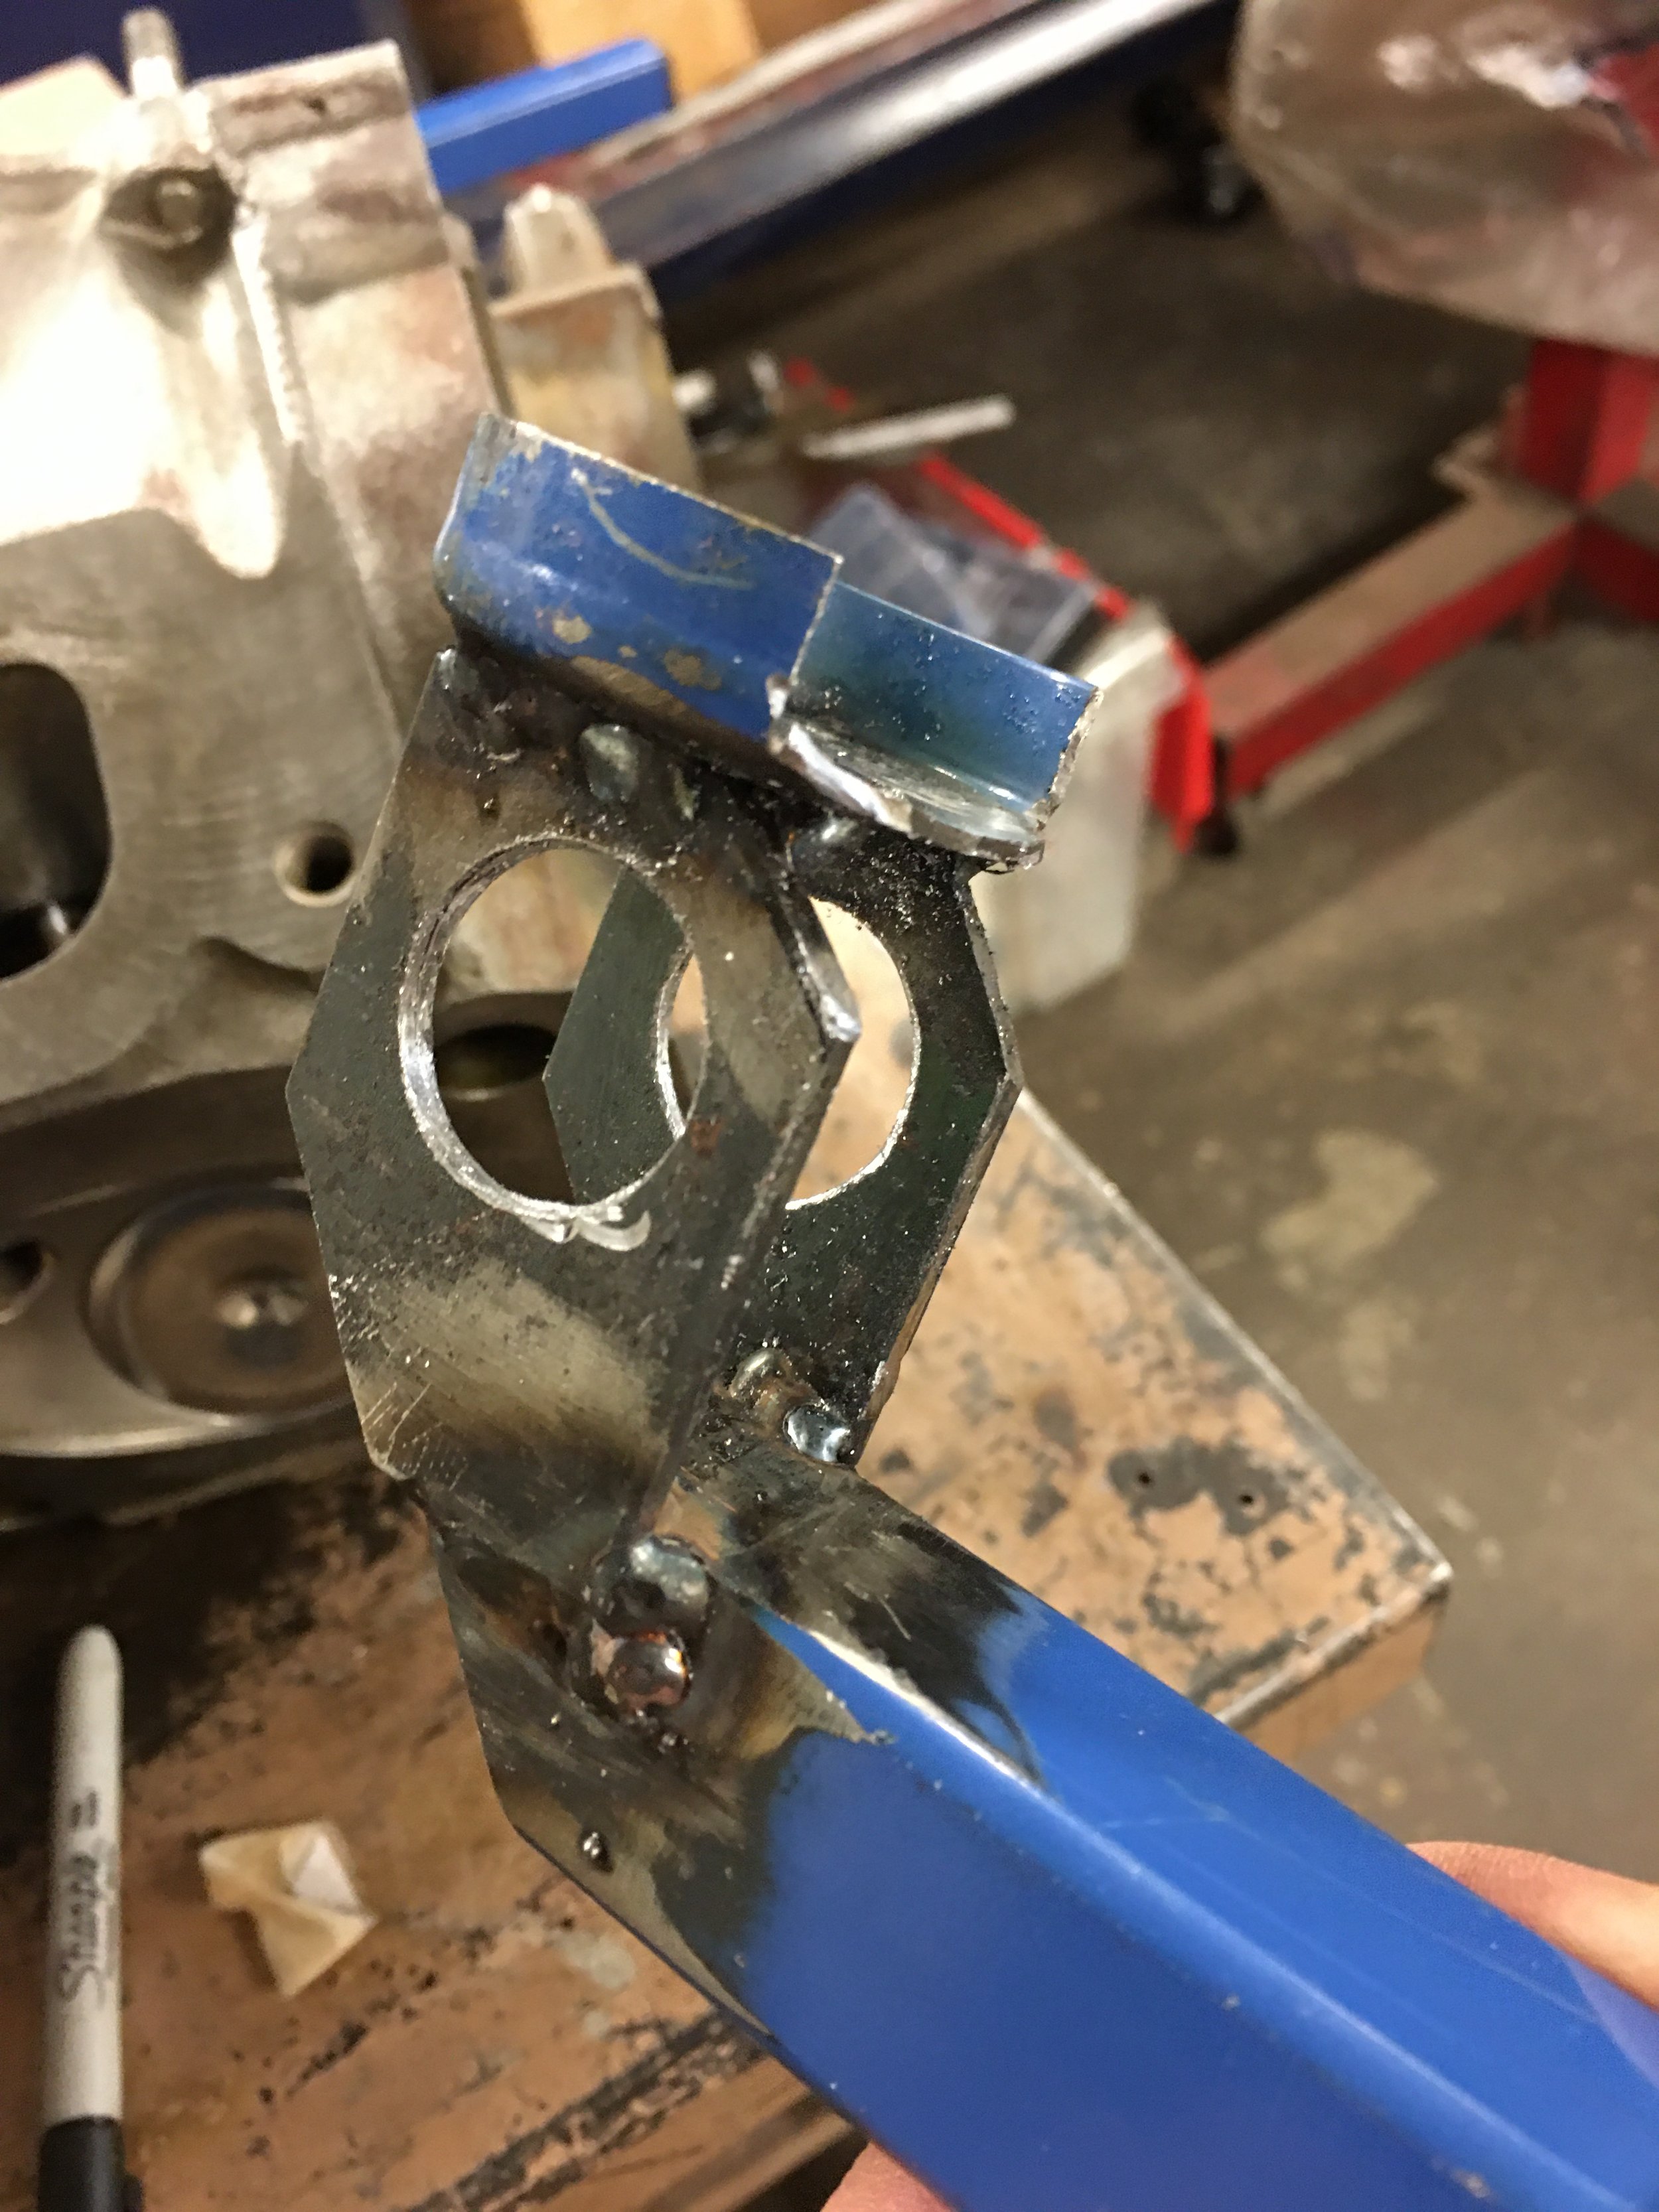
A few years ago, I was having an issue with using my old Sears and Roebuck spring compressors, they weren’t designed to work with a hemi style combustion chamber. The problem comes from the wide angle of the valves in relation to center line of the combustion chamber. The tool would not compress the spring because it was right against the cylinder head wall. After looking for a compressor that might work for me and failing, I sent an email to Jay Brown, SOHC guru and overall good guy. He sent me a picture of his modified compressor and I was on my way.

I remember seeing this design during my earlier search

Don’t know if it’s the exact same animal but it’s close. This is the Proform 66832 for those who may need to change the springs on their 427 SOHC heads.
As I mentioned and as you can see, this puppy needs a slight modification. The cup that holds the spring has the same issue as all of the other compressors, it can’t reach down into the top of the head to compress the spring. The wall of the head stops it.


Armed with my little blue spring compressor, The first spring put up a little fight. The locks didn’t want to break loose from the spring retainer. I had forgotten to tap on the retainer with a small hammer to break the bond.
Once the locks were freed, they literally fell to the bench top.
Release the pressure from the spring and get the compressor out of the way and the retainer and spring can be removed. Actually, the spring is going to be replaced so it was put into a box to make sure it stayed separated from the newer springs.

This is the spring cup/retainer and valve.


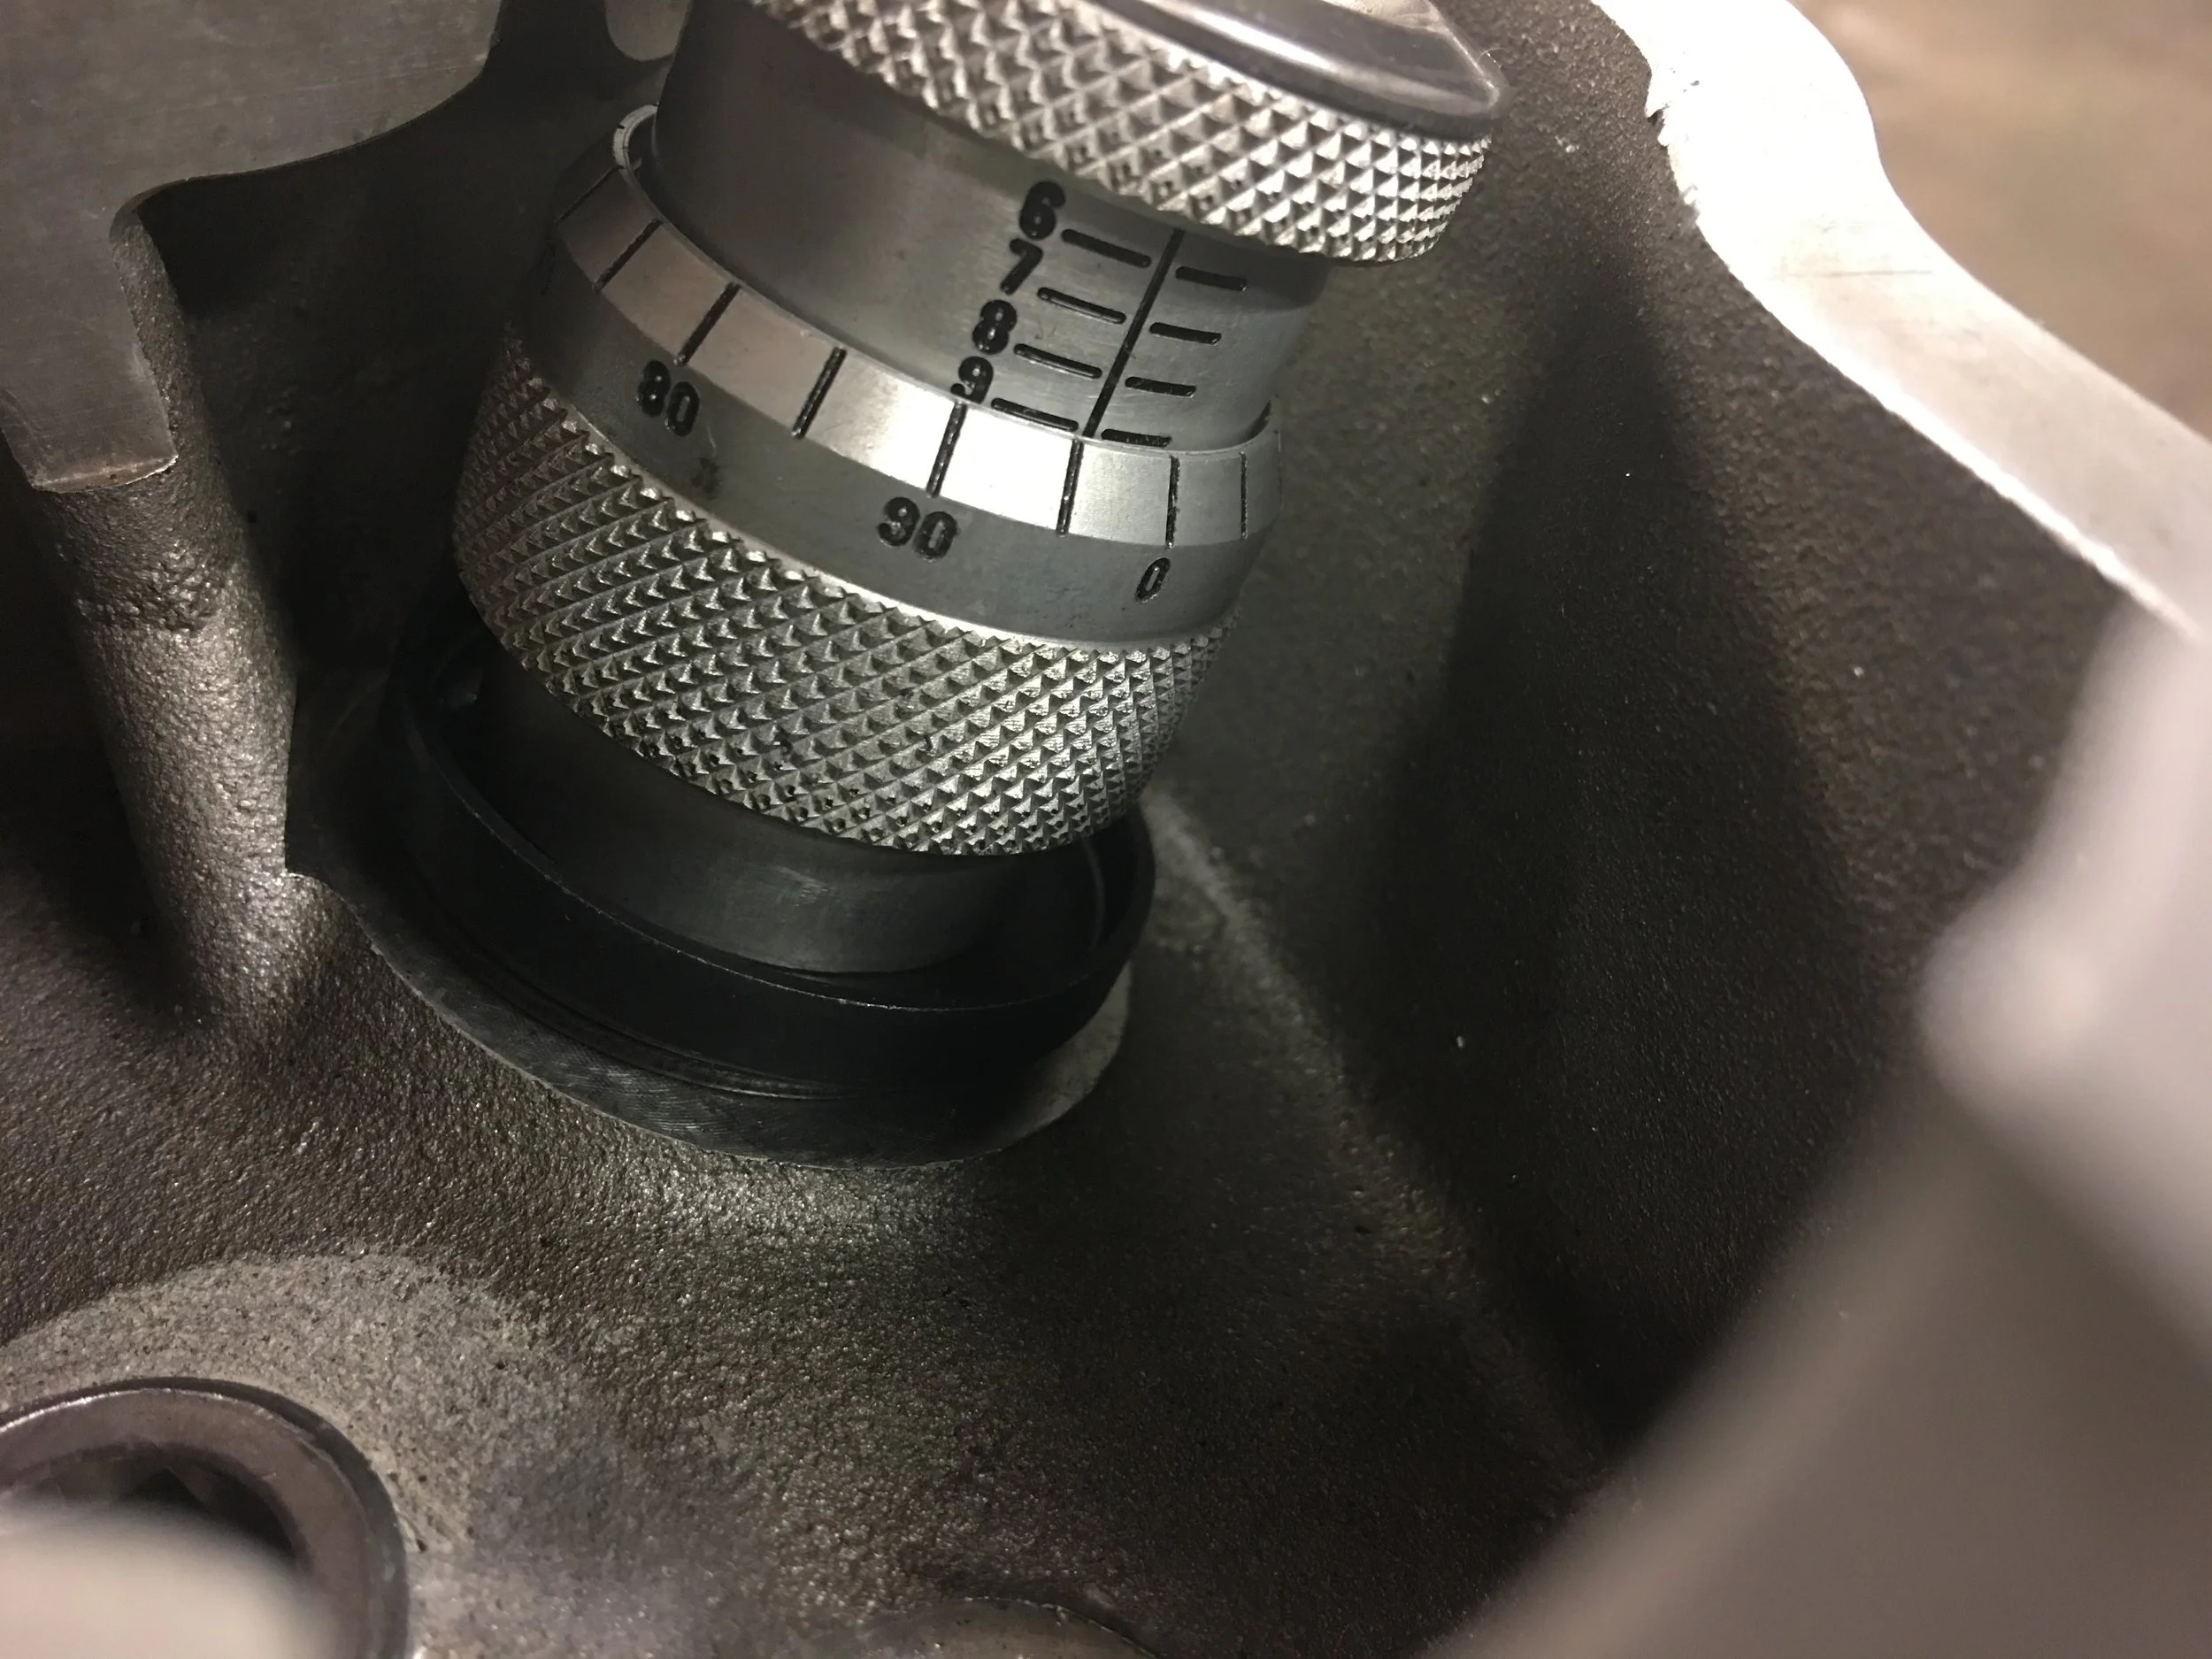
With the micrometer in place of the valve spring, the retainer and locks are put on which lock around the top of the valve stem. Once the everything is secured, the installed height dial indicator lower section is rotated clockwise causing the micrometer to lengthen. The dial is rotated until it can’t go any further. The gauge, when fully collapsed, is an inch and a half tall.
I was looking for a height of 1.90 +/- .02. The number I read was way less than what was asked for. Since it wasn’t 1.90”, I didn’t keep track of the number, all I thought was that I have to get the height to 1.90”.

If you look closely, you can see shims underneath the spring cup, this is how the installed height is adjusted. Because I like mind numbing detail, the machine shop had set the shim stack at three shims; 2).060” and 1) 030”. I removed the .030 and replaced it with a .015” shim. This brought the dial reading to the 1.895 shown in the picture above.
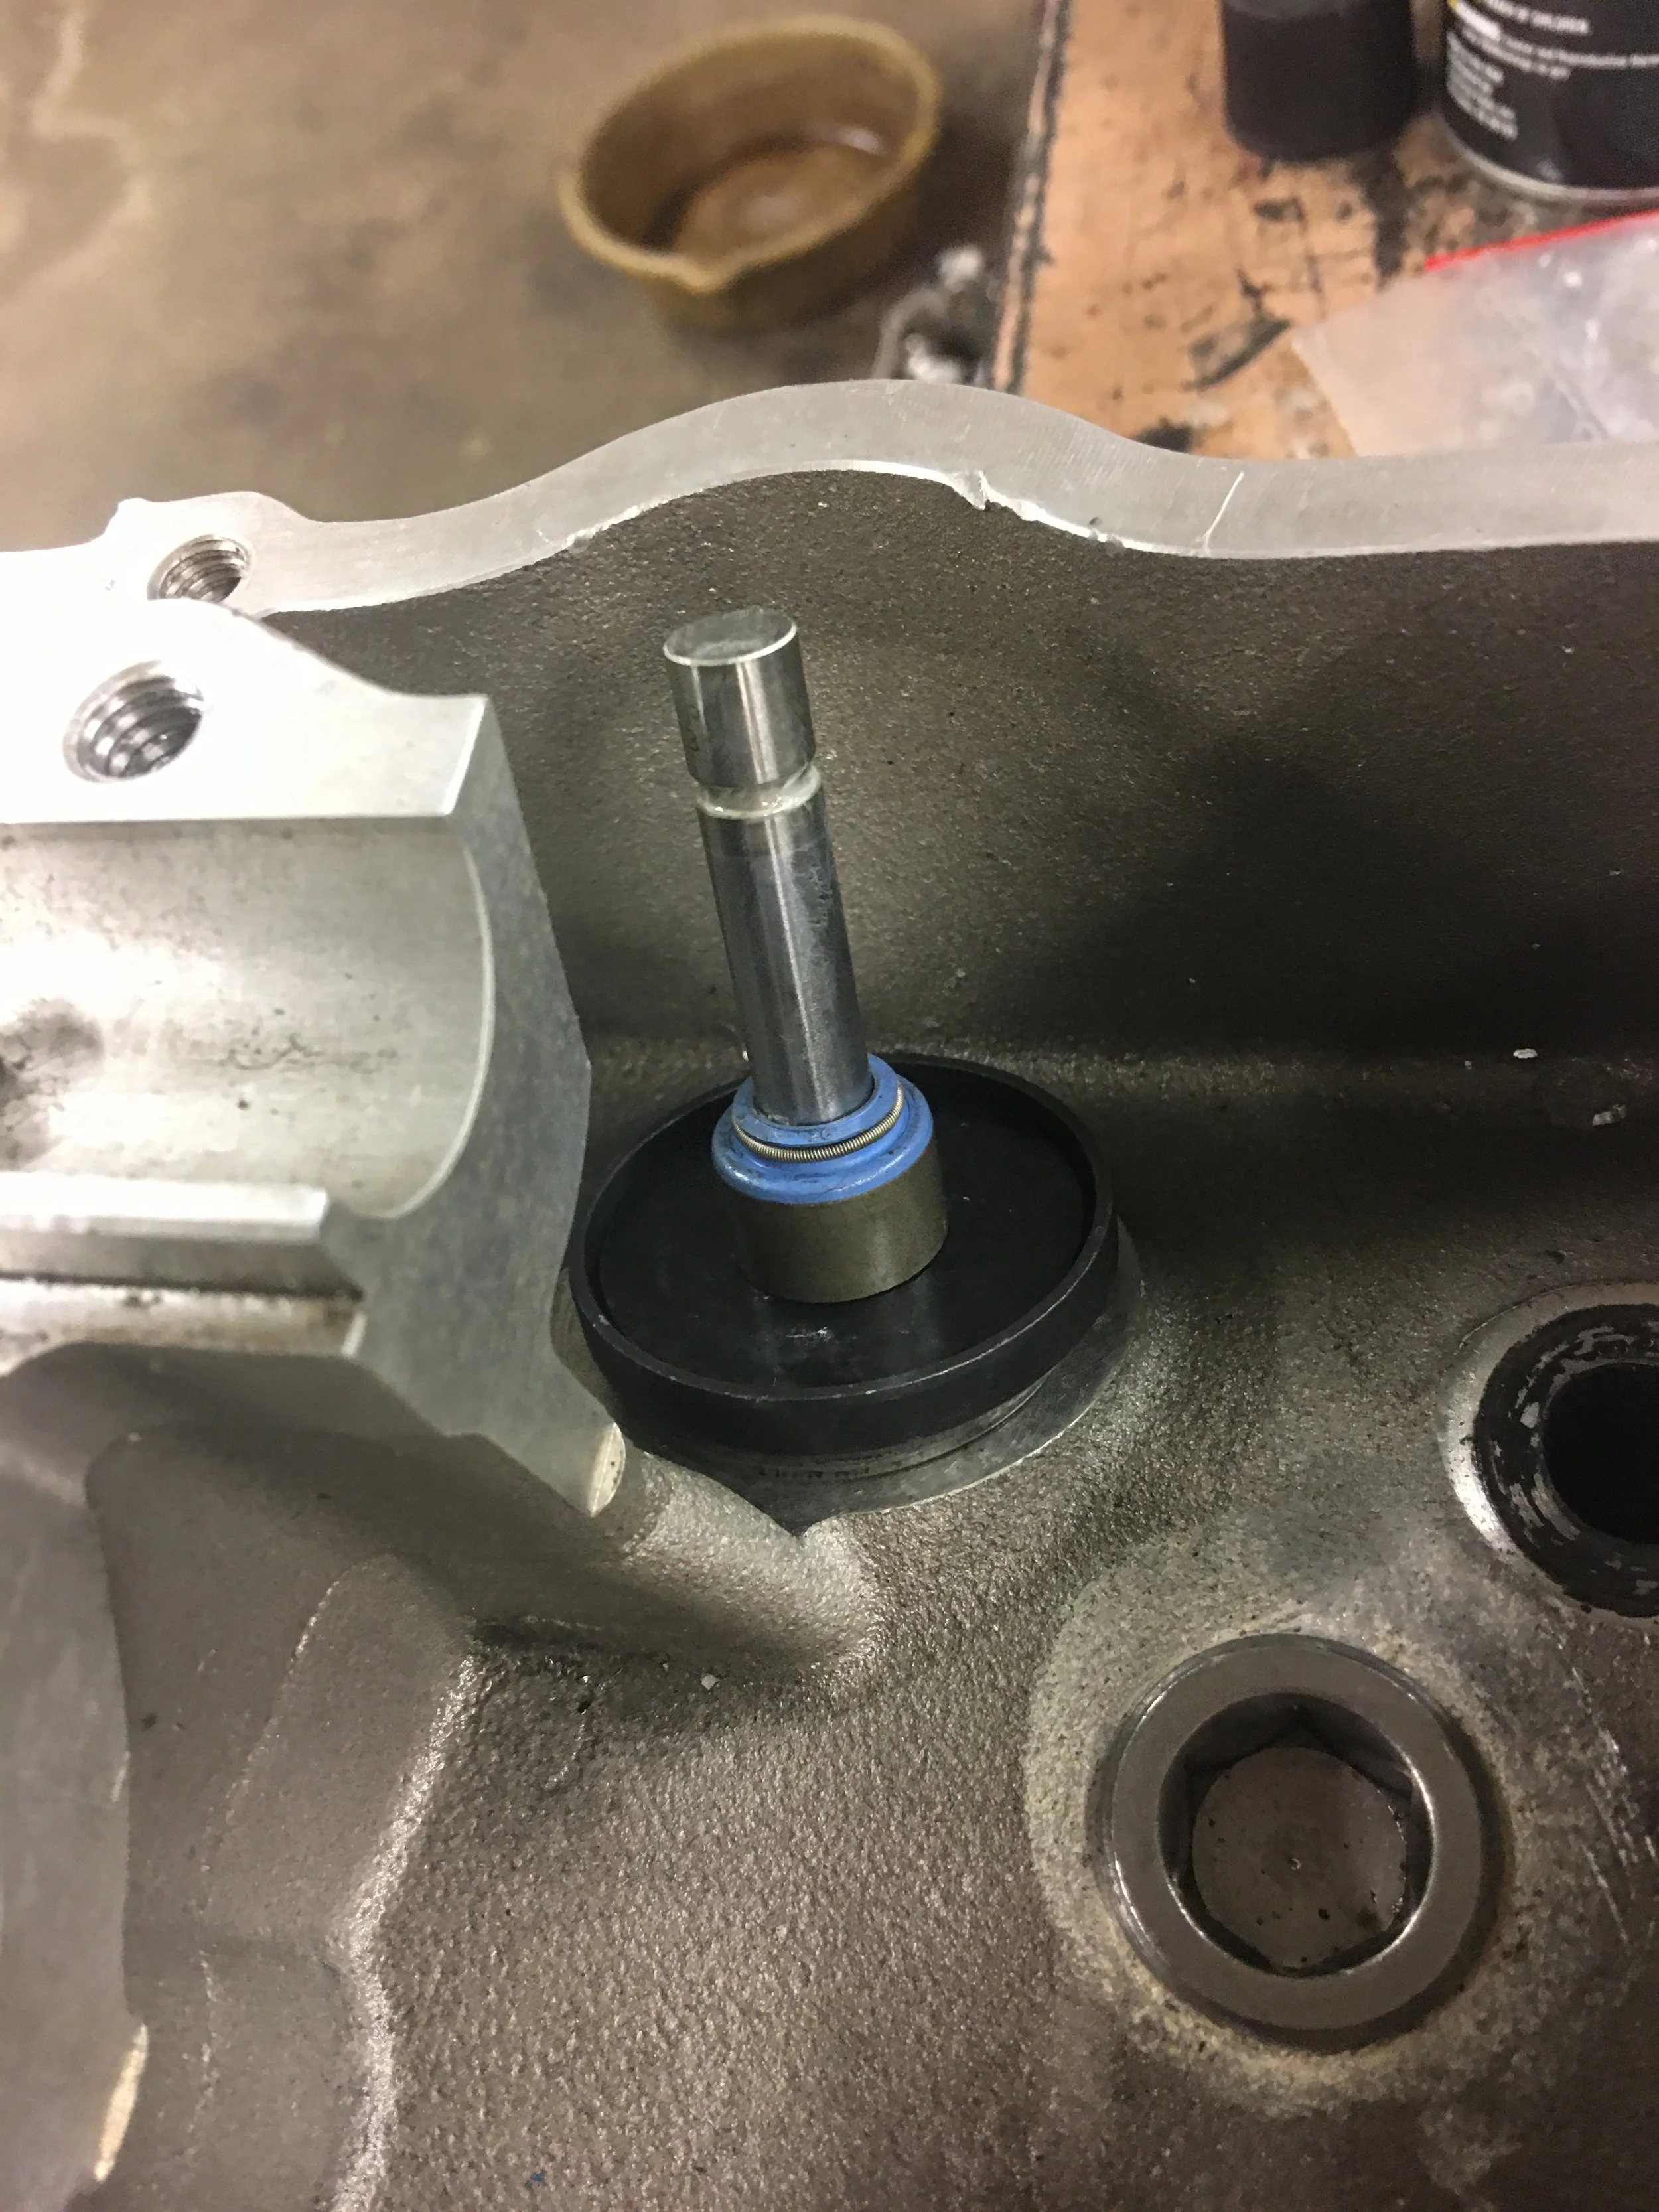

I should point out that the blue biscuit looking thing is a valve stem seal. This limits a certain amount of oil to pass along the valve stem to keep it lubricated. In order to remove the spring cup to access the shims beneath, the seal has to be removed. Before reassembling the valve spring for the final time, make sure the seal is put back in place. In the case where a shim was needed to get the spring pressure correct, that particular shim should be placed in the cup and then the oil seal can be slid back over the valve stem.

This picture shows two things. 1) It shows the necessity for the modification to the spring compressor. 2) I should have made the extensions narrower. I had to grind on the extensions slightly so they wouldn’t dig into the head.


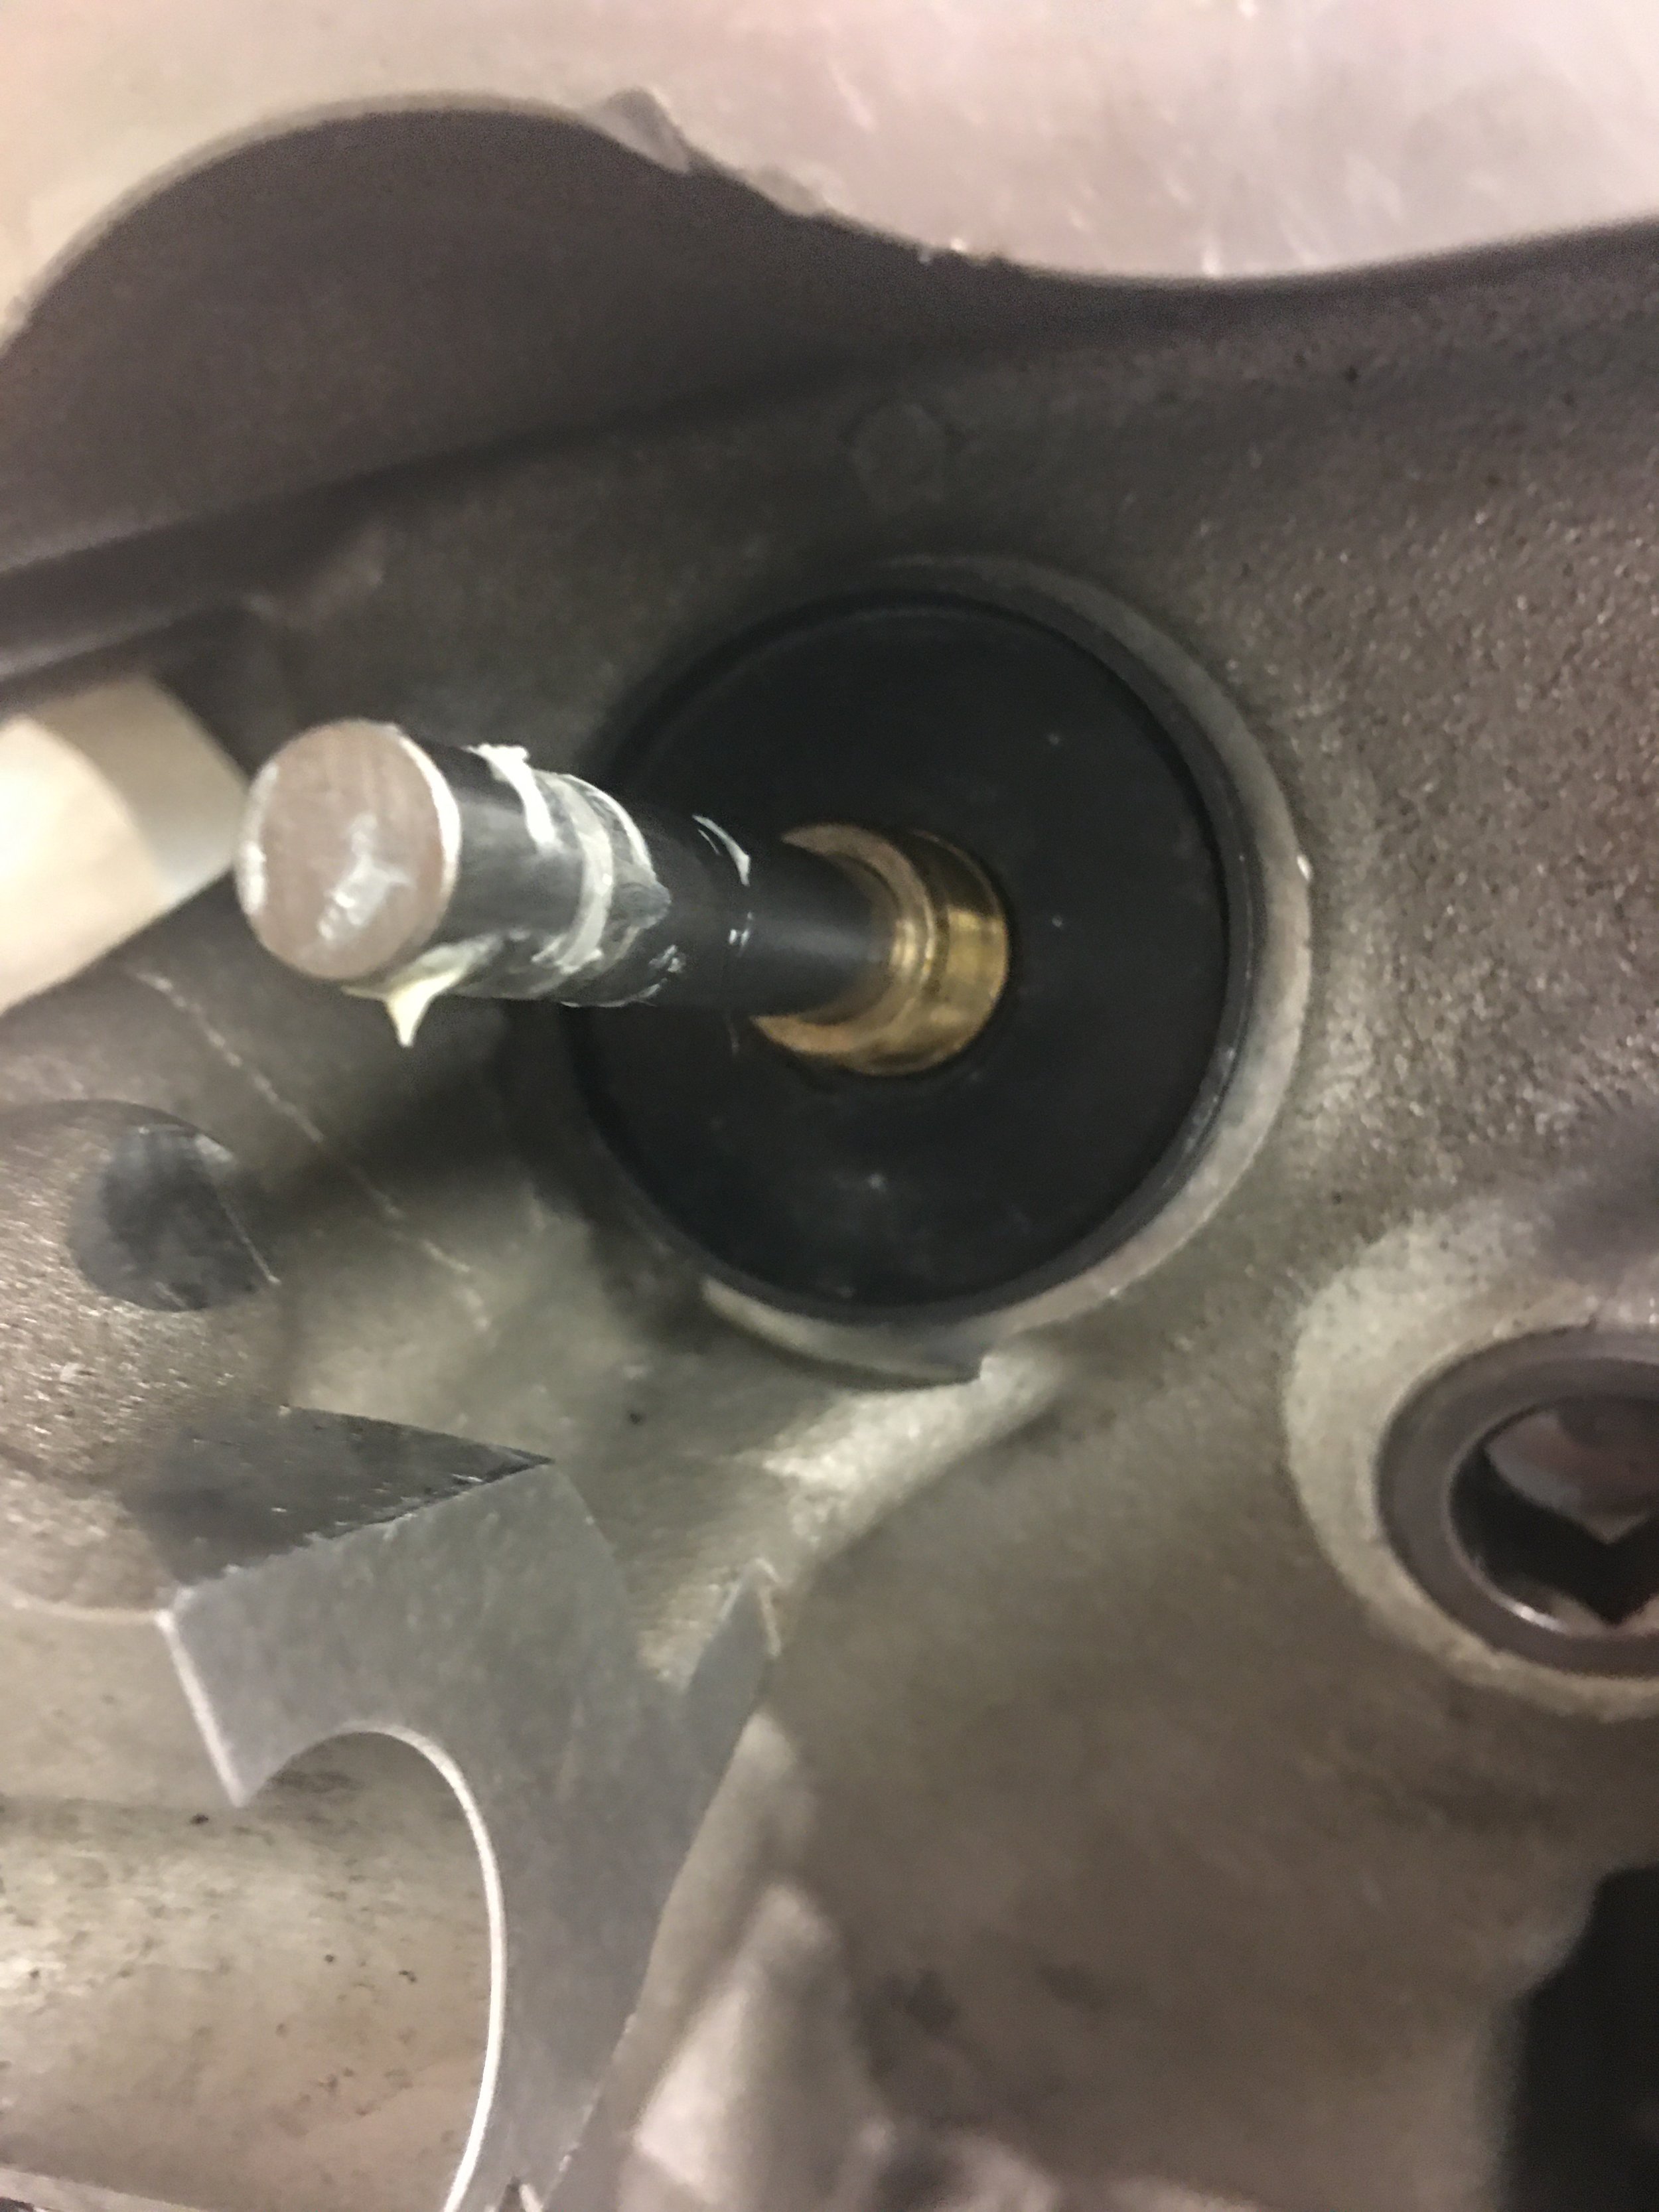
With the height set and the oil seal back in place, the valve spring can be assembled onto the valve stem once again. I found that white grease on the inside of the valve locks help hold them in place while the pressure is released
The springs I installed are Comp Cam 943’s and these require 1.90” installed height. The springs I removed are Comp Cam 928’s and they require 1.85” installed height. I didn’t realize the difference in installed height until after I had finished replacing the springs.
Working on these heads have taught me to always check EVERYTHING!!!
Had I not been goofing around and poking wires down holes, I never would have found that I could have suffered a catastrophic oiling issue to the camshafts because the machine shop was careless and didn’t check their work so the main oil passages for the camshafts were not drilled through to the main oil galley. Had I just run the heads, there would have been no oil to the cam journals. No telling what sort of damage would have resulted.
Had I not checked and set the installed spring height, the springs would have been installed at the wrong height which would have increased the seat pressure which could have caused excessive wear on the valve seat.
No assuming that it’s all good.