
Where was I?
With a new primary gear in hand and prior distractions taken care of, it’s now a good time to pick up where I left off and get this stub cam assembled.
The new primary chain set I received is from an Australian company called Romac. My harmonic balancer is from the same company. The set is not specifically for the cammer but Doug Garifo, Precision Oil Pumps, modifies these to work on the SOHC engine.
Just as before, the sprockets are stacked onto the stub cam. With the cam drive sprocket already drilled in preparation for pinning the sprockets together, I use it as the guide to drill this new primary sprocket

old sprocket, same idea.
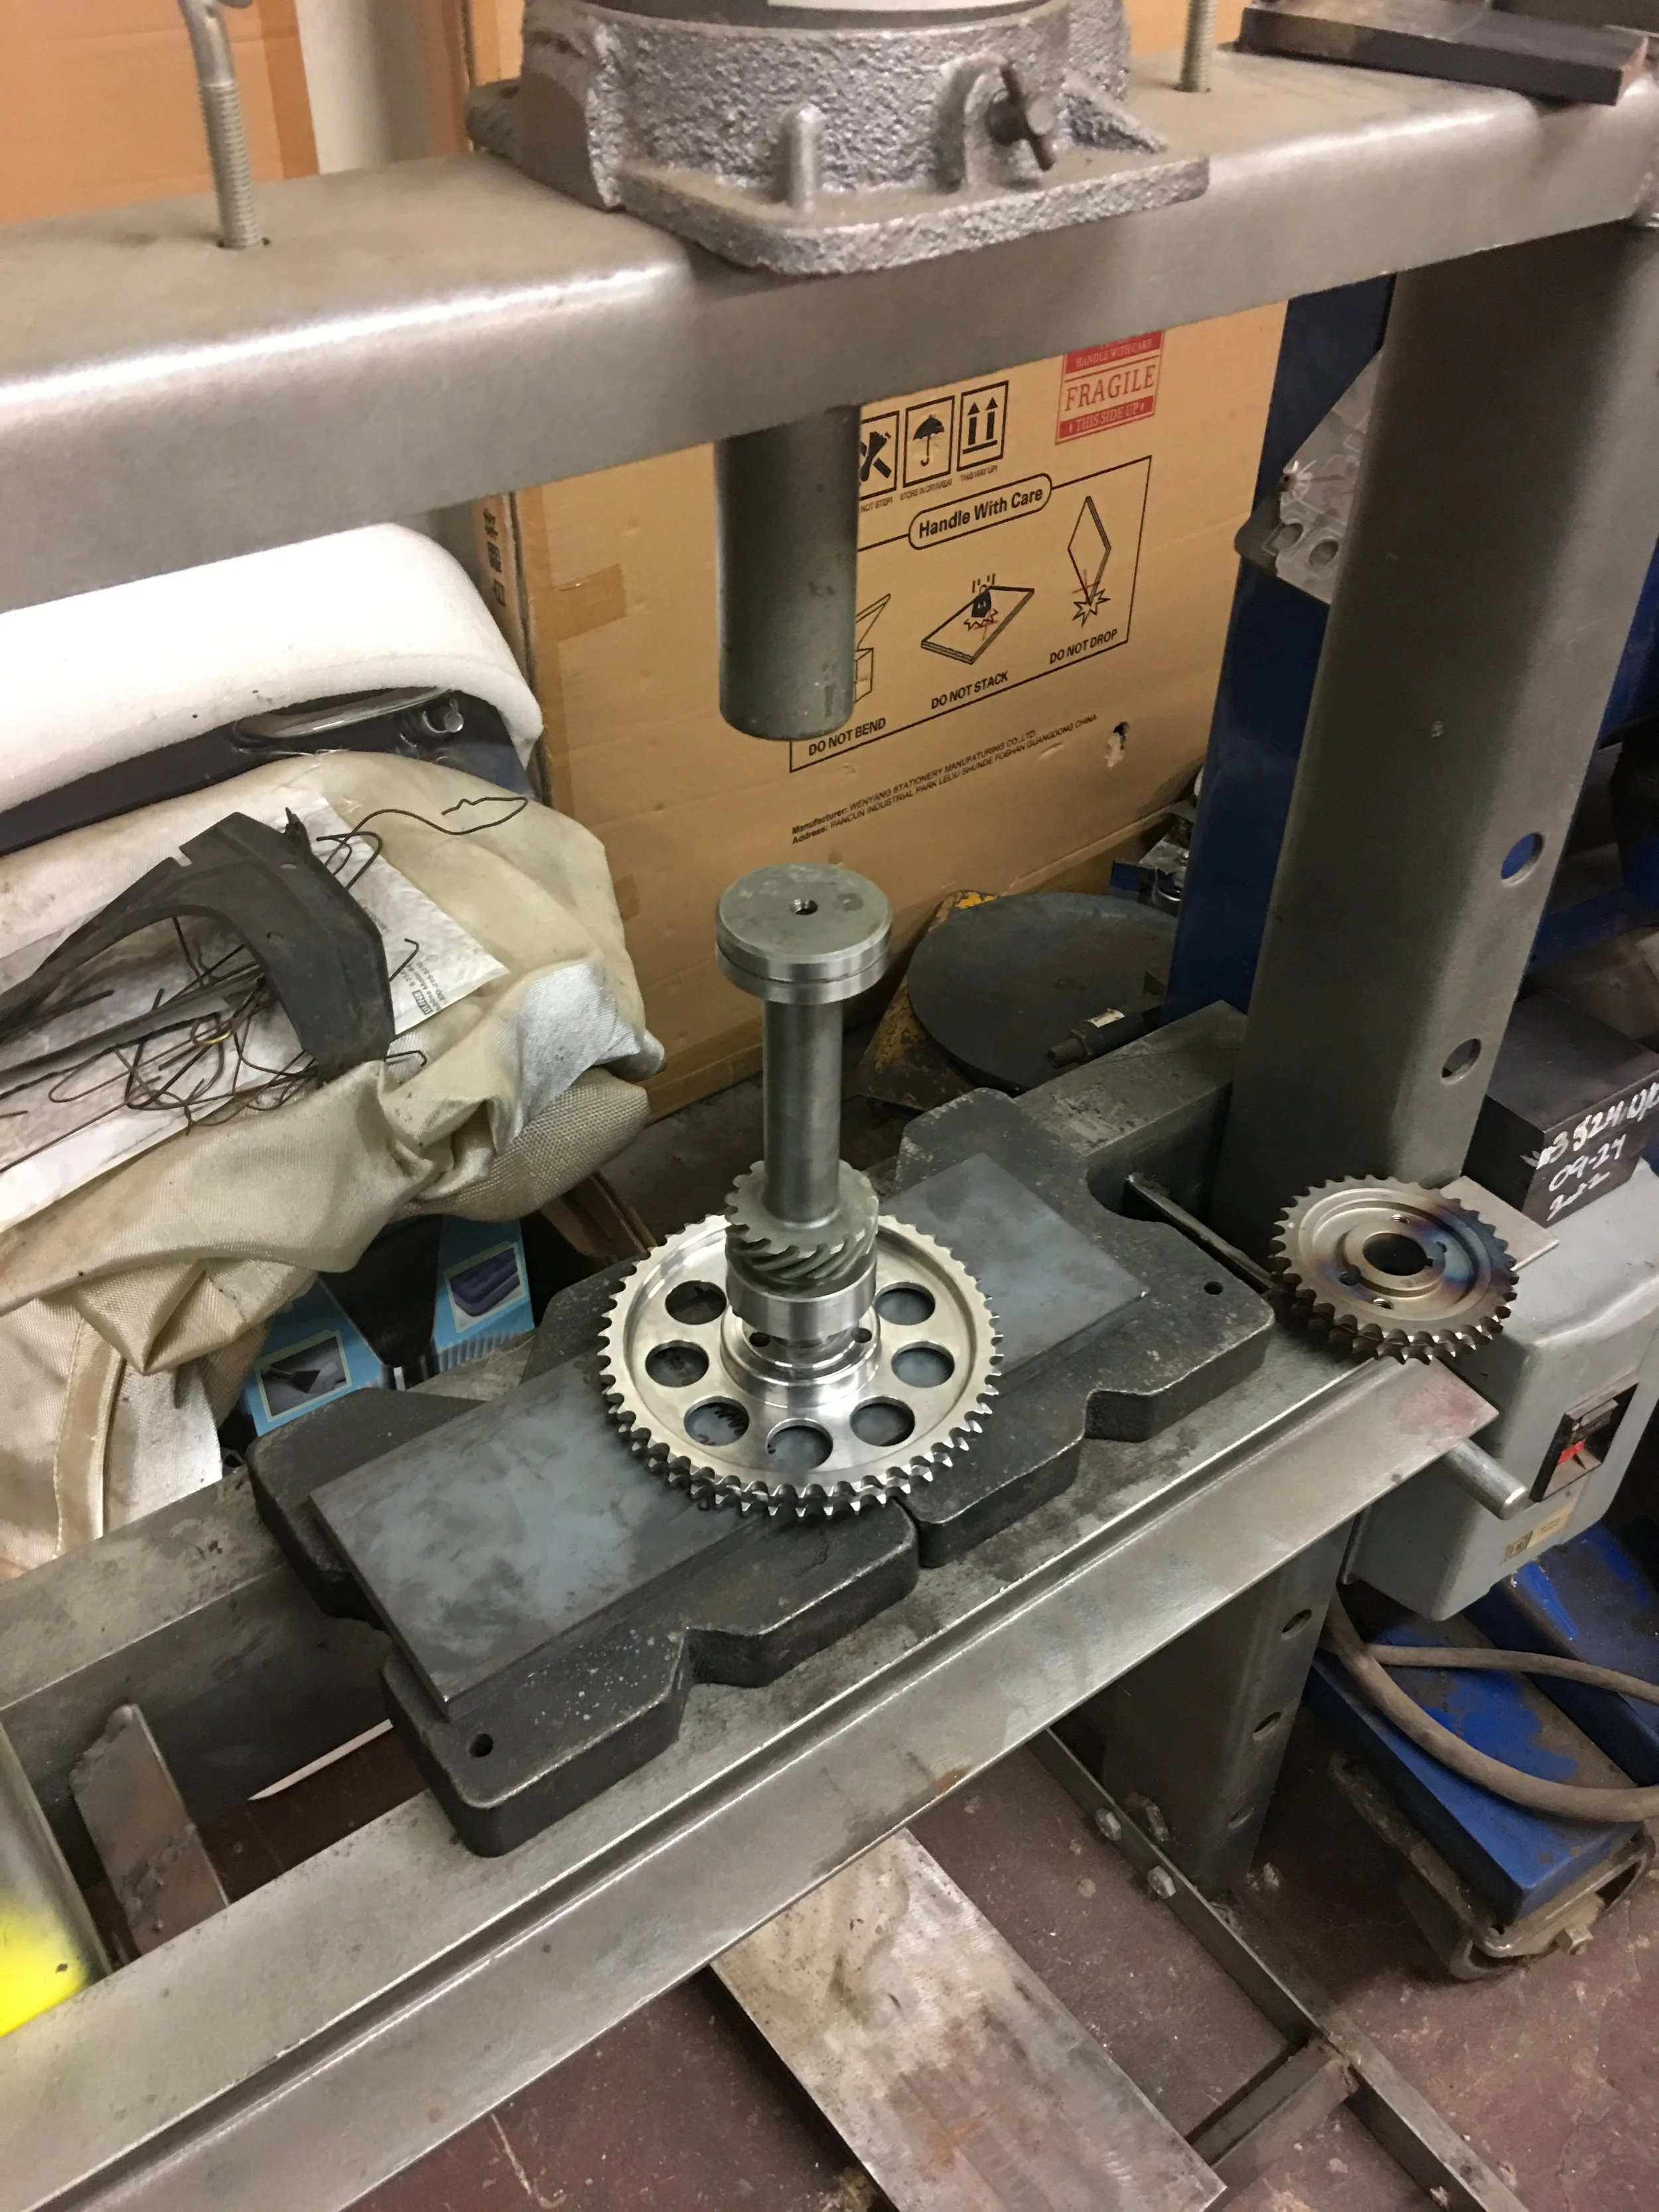
Because the primary sprocket abuts the front journal of the stub cam, I don’t want to drill into it when the sprocket is drilled through so obviously I don’t. The drill penetrates maybe half the thickness of the sprocket and then it’s necessary to disassemble the stub cam assembly once again.
This time around, with the proper support jig in hand, the primary sprocket presses off of the stub cam without damaging it this time.
With the holes already started, aligning the sprocket to the drill bit on the press and clamping it down to ensure a clean cut is way easy and takes barely any time.

I’m always suspicious that I’ve screwed something up so before I move on, I have to test fit the pins. Super snug. Perfect.
Some simple math and I get the length that the pins should be.

With the sprockets drilled and the pins cut to size, I can’t stall any longer. It’s time to put the stub cam assembly together for, hopefully, the final time.
The primary sprocket is pressed on but it doesn’t seat properly, not to my satisfaction anyway. I can see a gap between the back of the sprocket and the cam journal. Maybe some metal chips?
I take the sprocket off and press it back on a couple of times before I figure out the problem. The stub cam has a filet between the shaft and the journal. I take a look at the broken sprocket and it’s got a huge relief cut into it opening on the back side. A few minutes with a grinding stone and the new sprocket has a similar but smaller relief cut into it. The sprocket seats nice and solid against the journal. Now the assembly can continue.
With the cam drive sprocket pressed on, it’s time to see if I managed to drill the holes in the sprockets true enough that the locking pins press all of the way through.
I have an arbor press I picked up. I wanted it for a make shift valve spring checker. I’ve found a ton of uses for it besides checking springs and it comes in handy now to sink the pins through the sprockets.
Because of the way the cam drive sprocket is made, it requires an extra step to seat the pin properly.

A 5/16'“ punch in conjunction with the arbor press and the pins are seated a hair beneath the face of the sprocket.

The fit is very, very snug and I doubt the pin can work its way out but to add a little insurance, the edges around the pin are staked with the center punch. It doesn’t look pretty but it should keep the pins in place.

Not as trick and elaborate as what Jay Brown is able to do on his build but it should keep sprockets from spinning at different speeds from each other if the keyway shears.