
Heater Blower Motor
Having found that the stock Boss 429 Mustang brake booster system would allow me the clearance to get a master cylinder in the car around the 427 SOHC, I was hoping there might be a special Boss 429 heater motor. I couldn’t find anything about them if they did exist. Now that I think about it, maybe the Boss 9 didn’t have a heater.
I had the engine in the car for some look-see test and noticed how close the back of the engine came to the firewall. I thought that maybe I just hadn’t been paying attention to engine bay clearances.


I grabbed the heater motor and popped it into the heater motor hole and… the motor wouldn’t seat at all. It hit the back of the engine
Mulled over different options. Later models looked shorter but the squirrel cage fan diameters were too large. The wiring was also a little more complex for something as simple as the 69 Mustangs wiring.
In the end, it came down to what the theme of this blog has become, must modify.


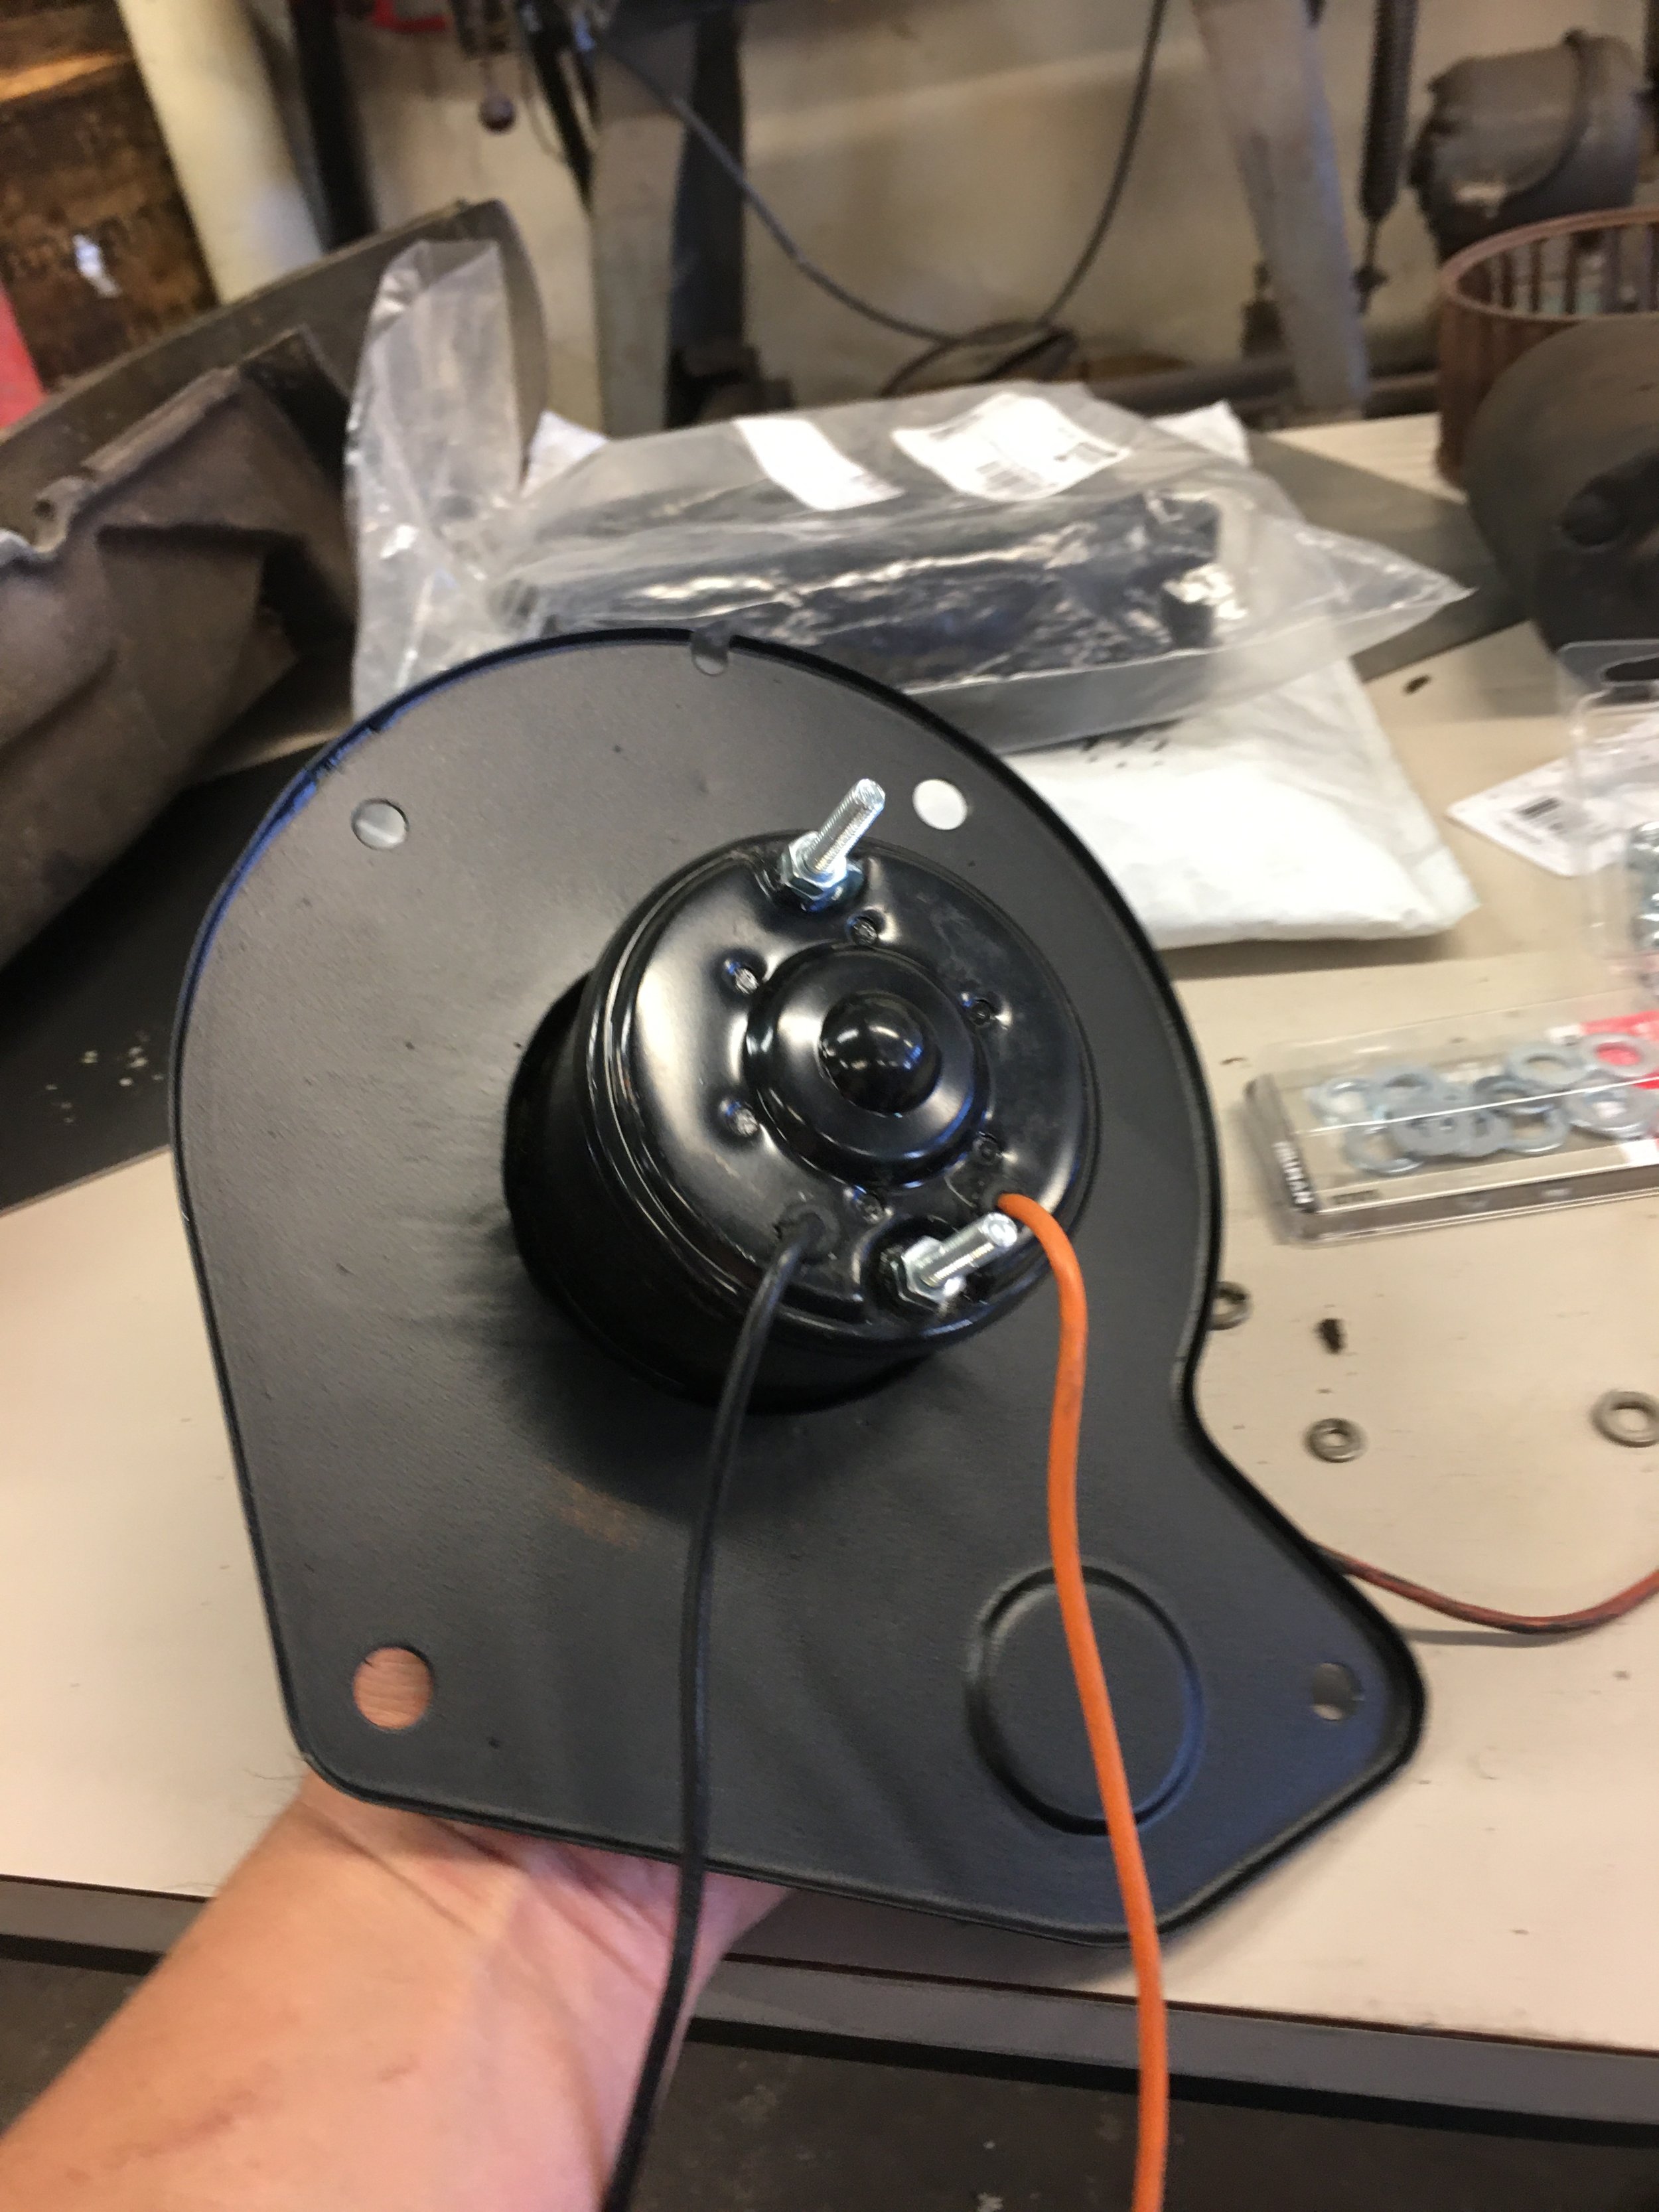
The motor is mounted on a relatively flat mount.
To fit back into the car behind the Cammer, the mount will have to be modified to allow the motor to be sunken into it enough to allow the motor to clear the engine.
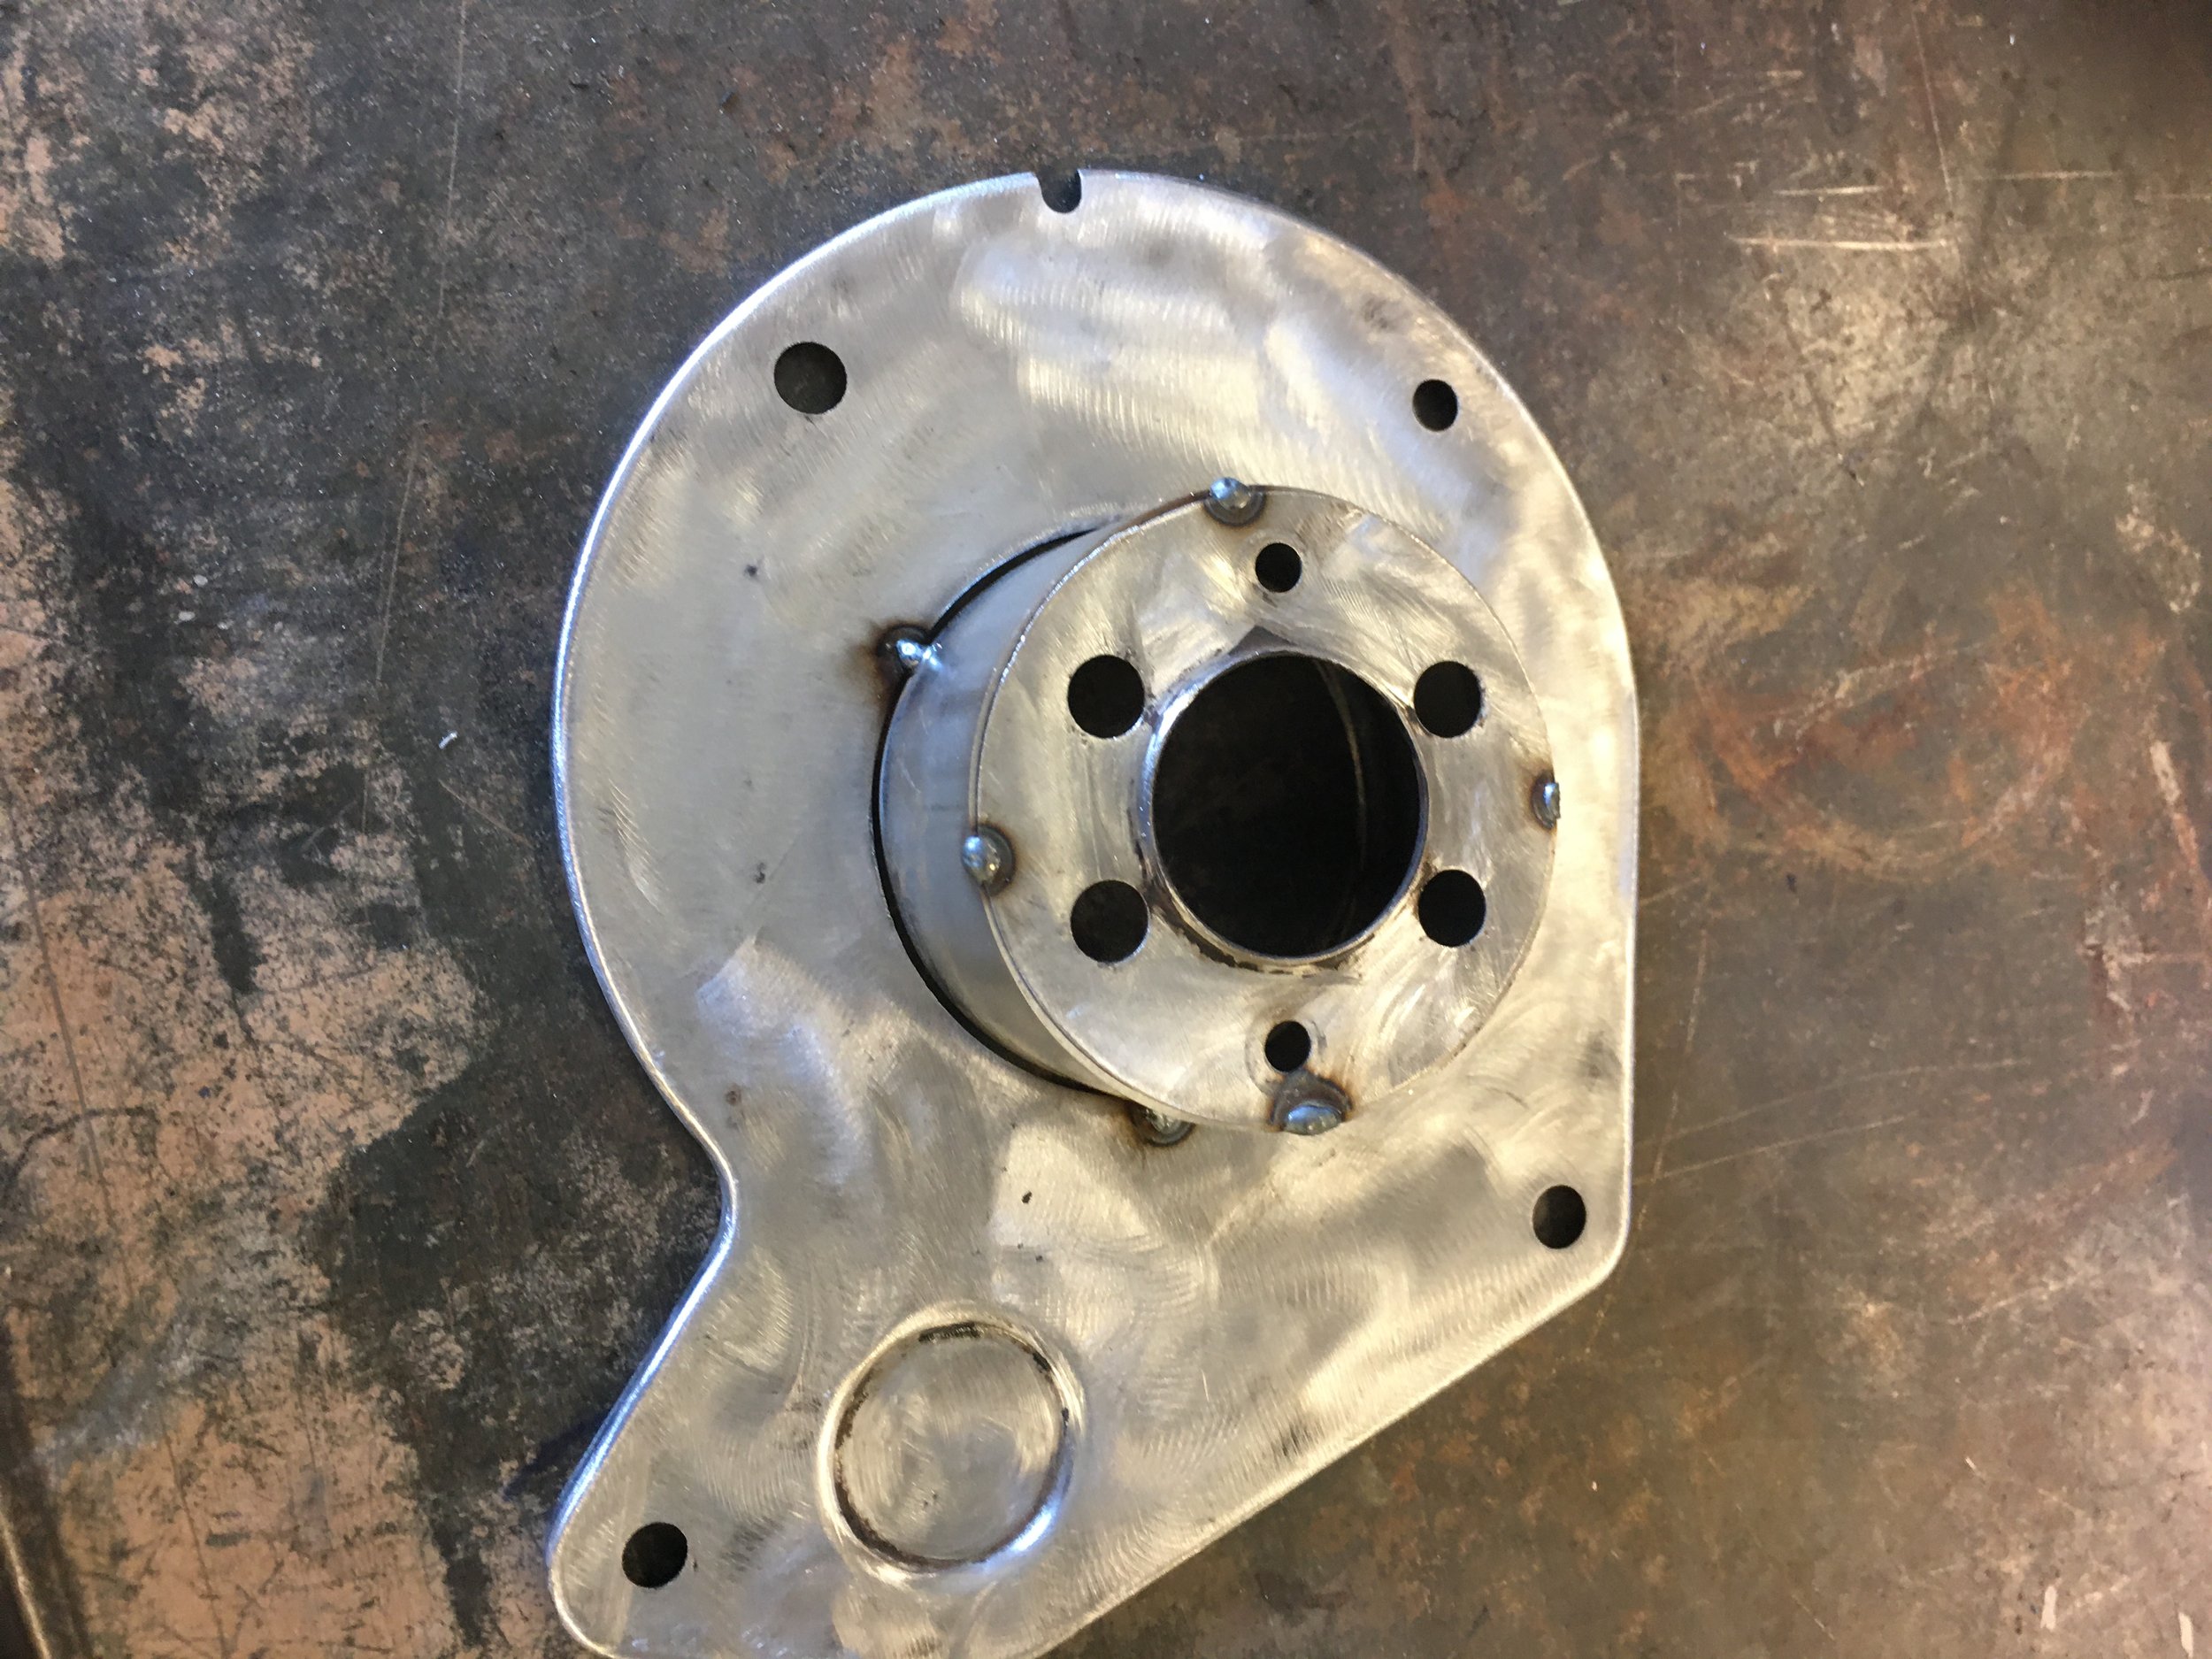
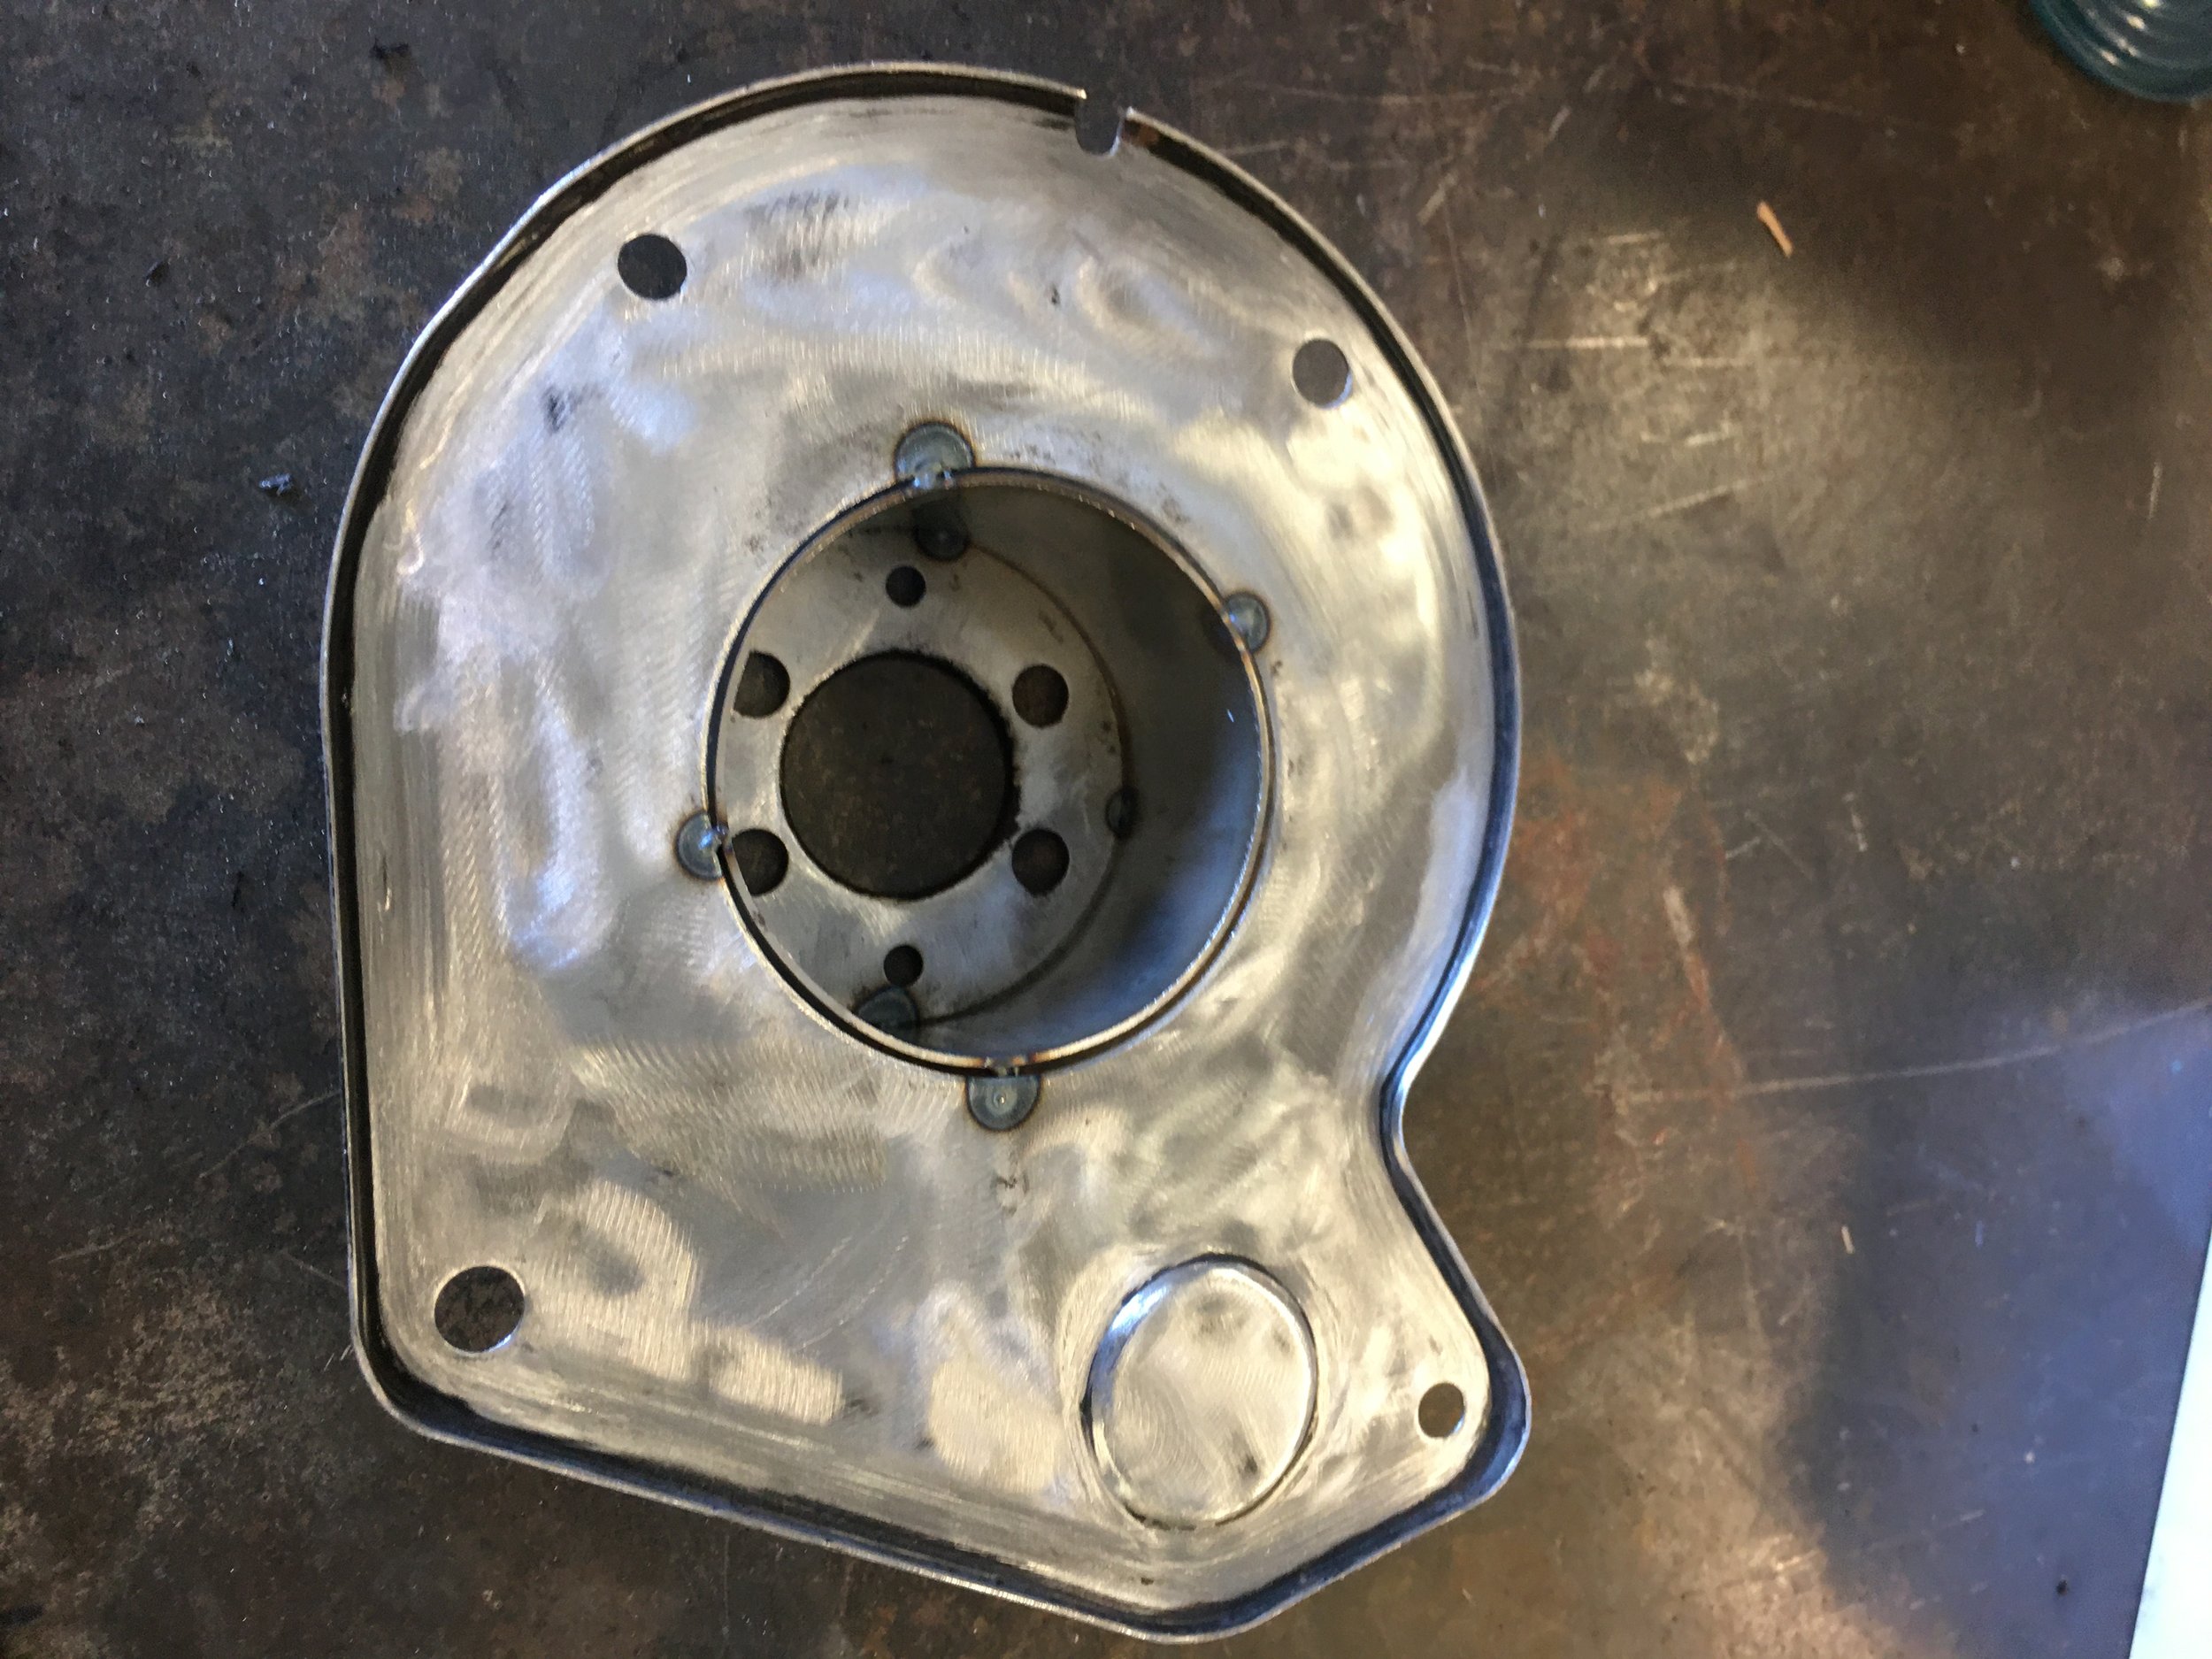

The center of the mount, the section that the motor screws to, is cut out with a hole saw and then welded to a short length of 2.5 inch OD exhaust tube. This part is then welded back onto the main blower motor mount
I decided to go with a new motor but unfortunately the motor has the wires coming from the side as the OG motor has them coming out of the end. I need the wires to exit from the end cap.


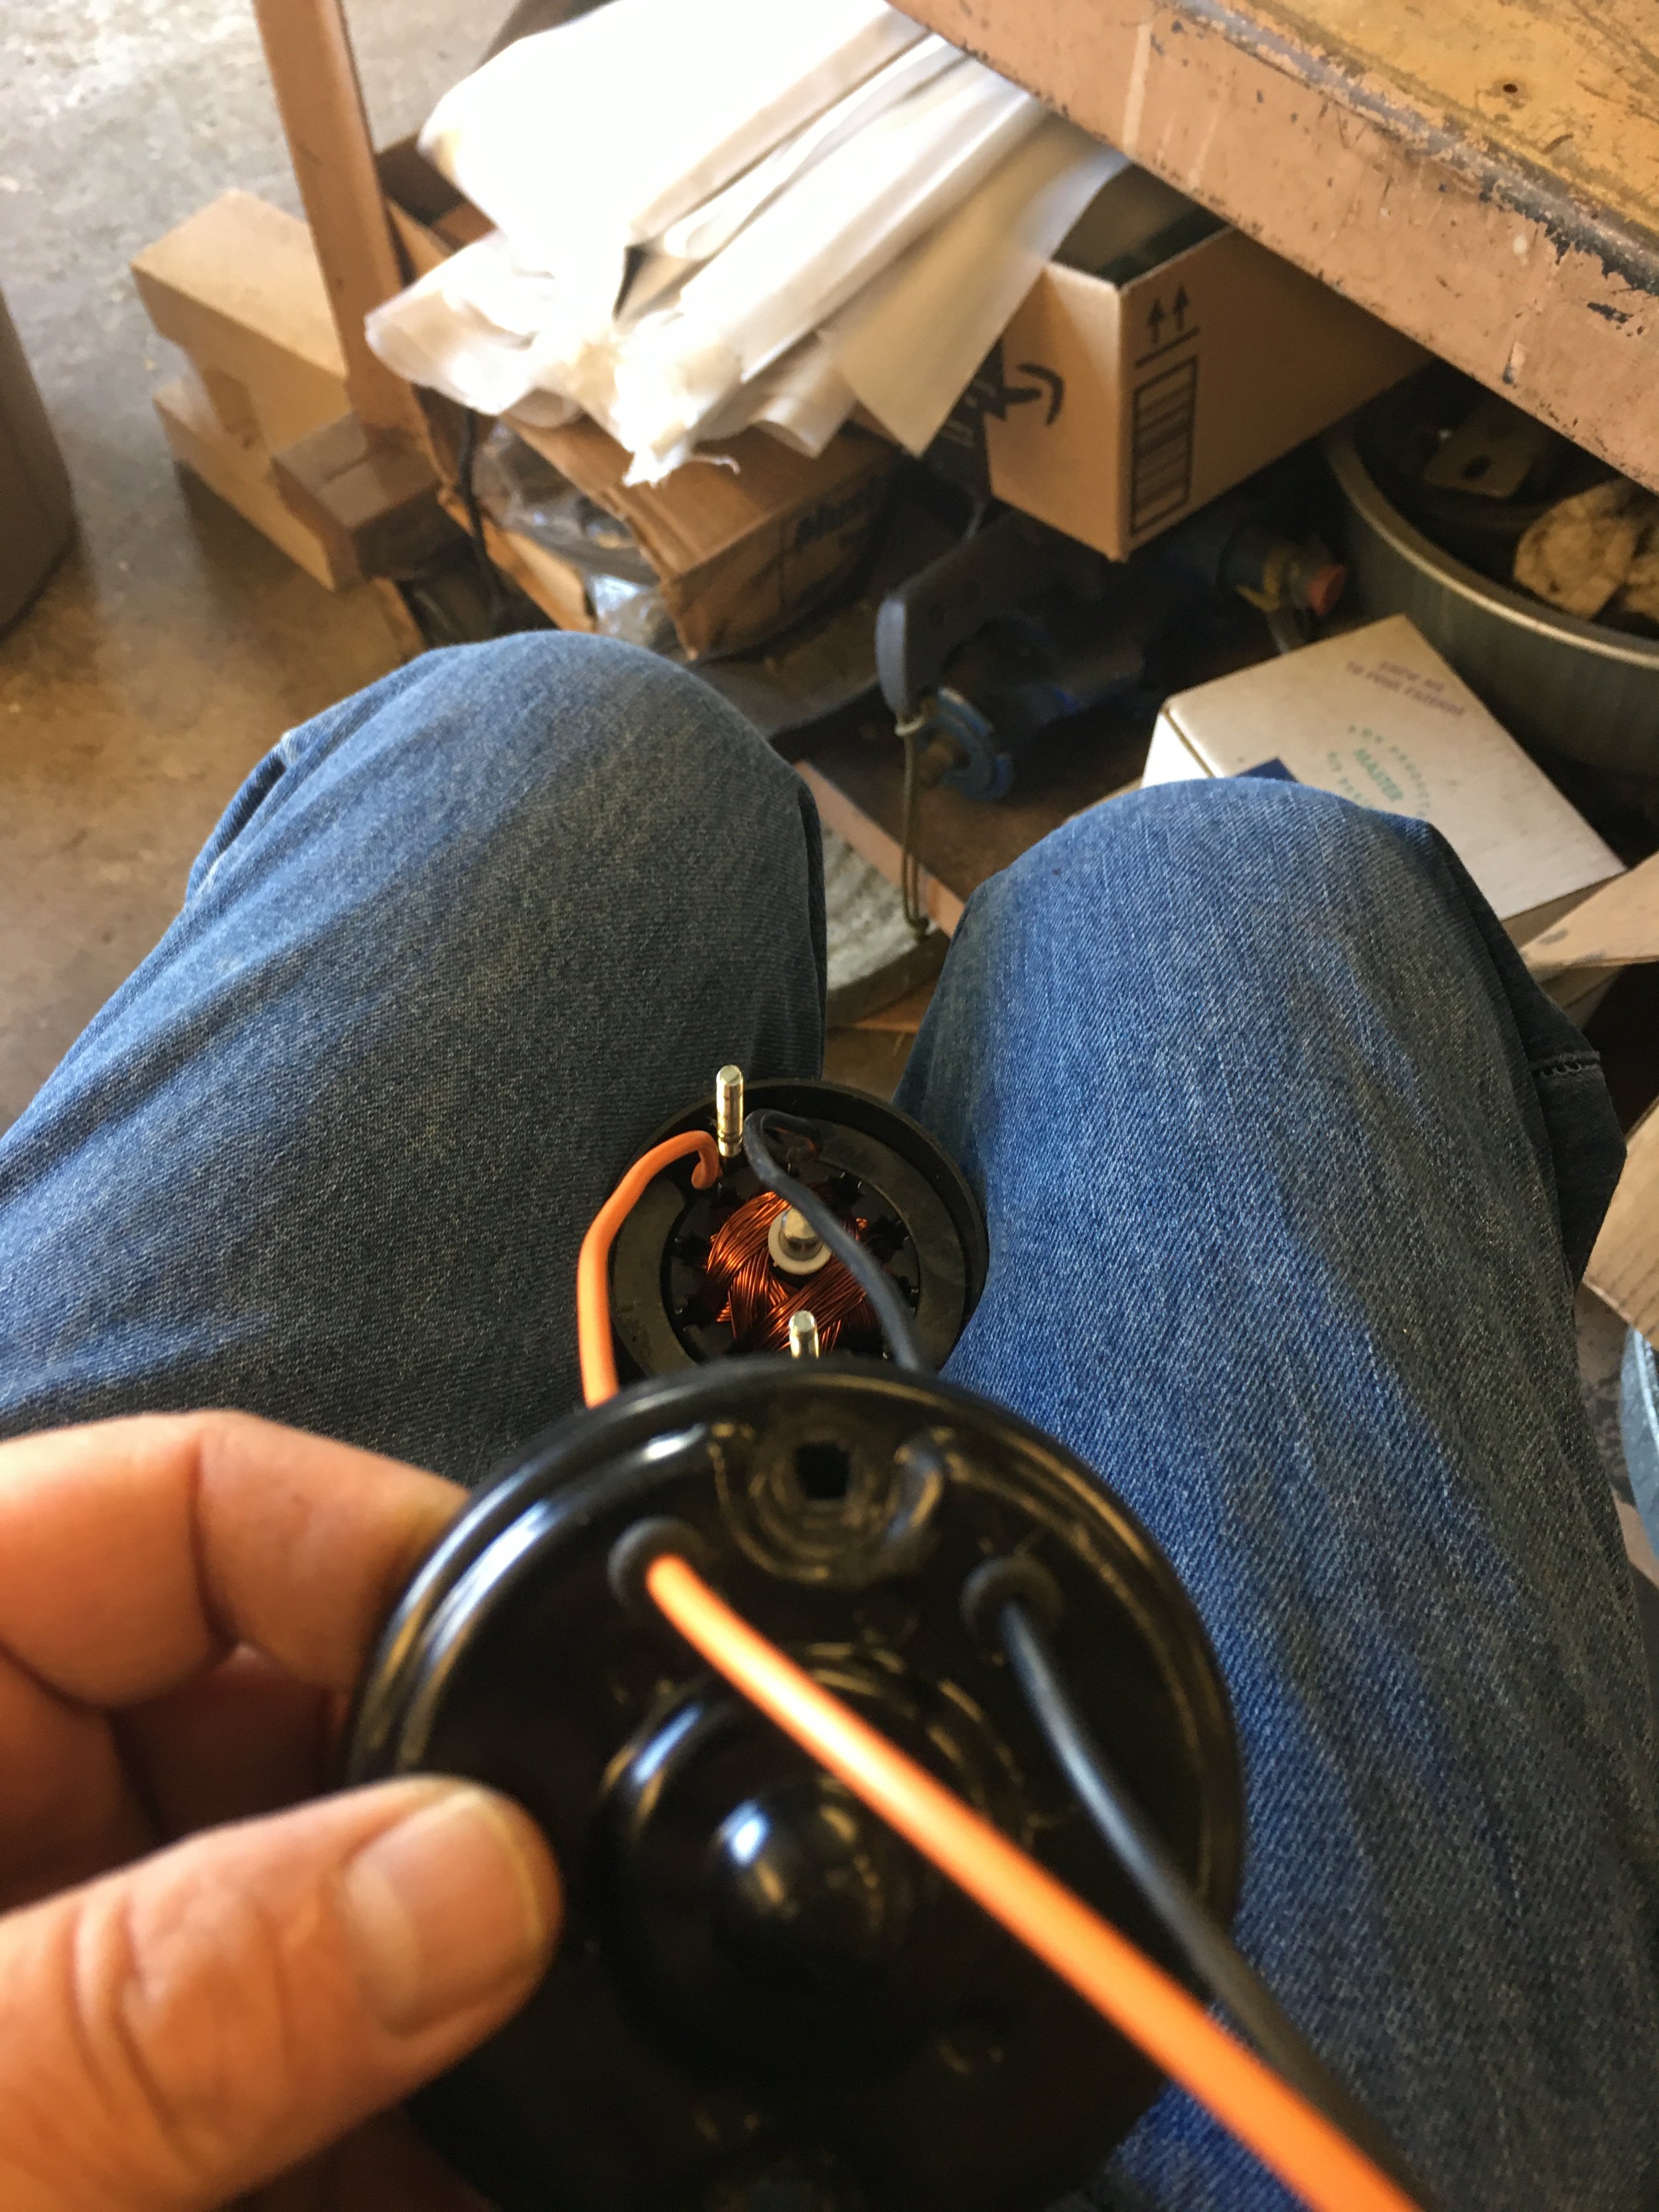

Removed the end cap and drilled two holes close to one of the studs the run the length of the motor. Supplemented the drilled holes with rubber grommets to protect the wires. Luckily the motor came with extra long leads and I was able to route them very close to the stud in the motor. Actually, the wires were tie wrapped to the threaded stud to keep them out of the motor windings.
After testing the motor to make sure I put it back together correctly, It was a good time to check the fit of the motor into its new modified mount.


The drive shaft needed to be modified. I grabbed a 1/4”-20 cutting die and threaded the output shaft of the motor.


This modification had been in the works for awhile. I put it off because the fan would be the biggest obstacle. I would have to make it myself.
Thinking about what you want to make and how to create it are two different things. I didn’t know how to take the idea in my head and recreate it in a 3D drafting program. After several false starts, I finally got serious and decided that the fan had to be made. It’s funny, once I decided that I really had to make the fan, it didn’t take much time at all to come up with a design.

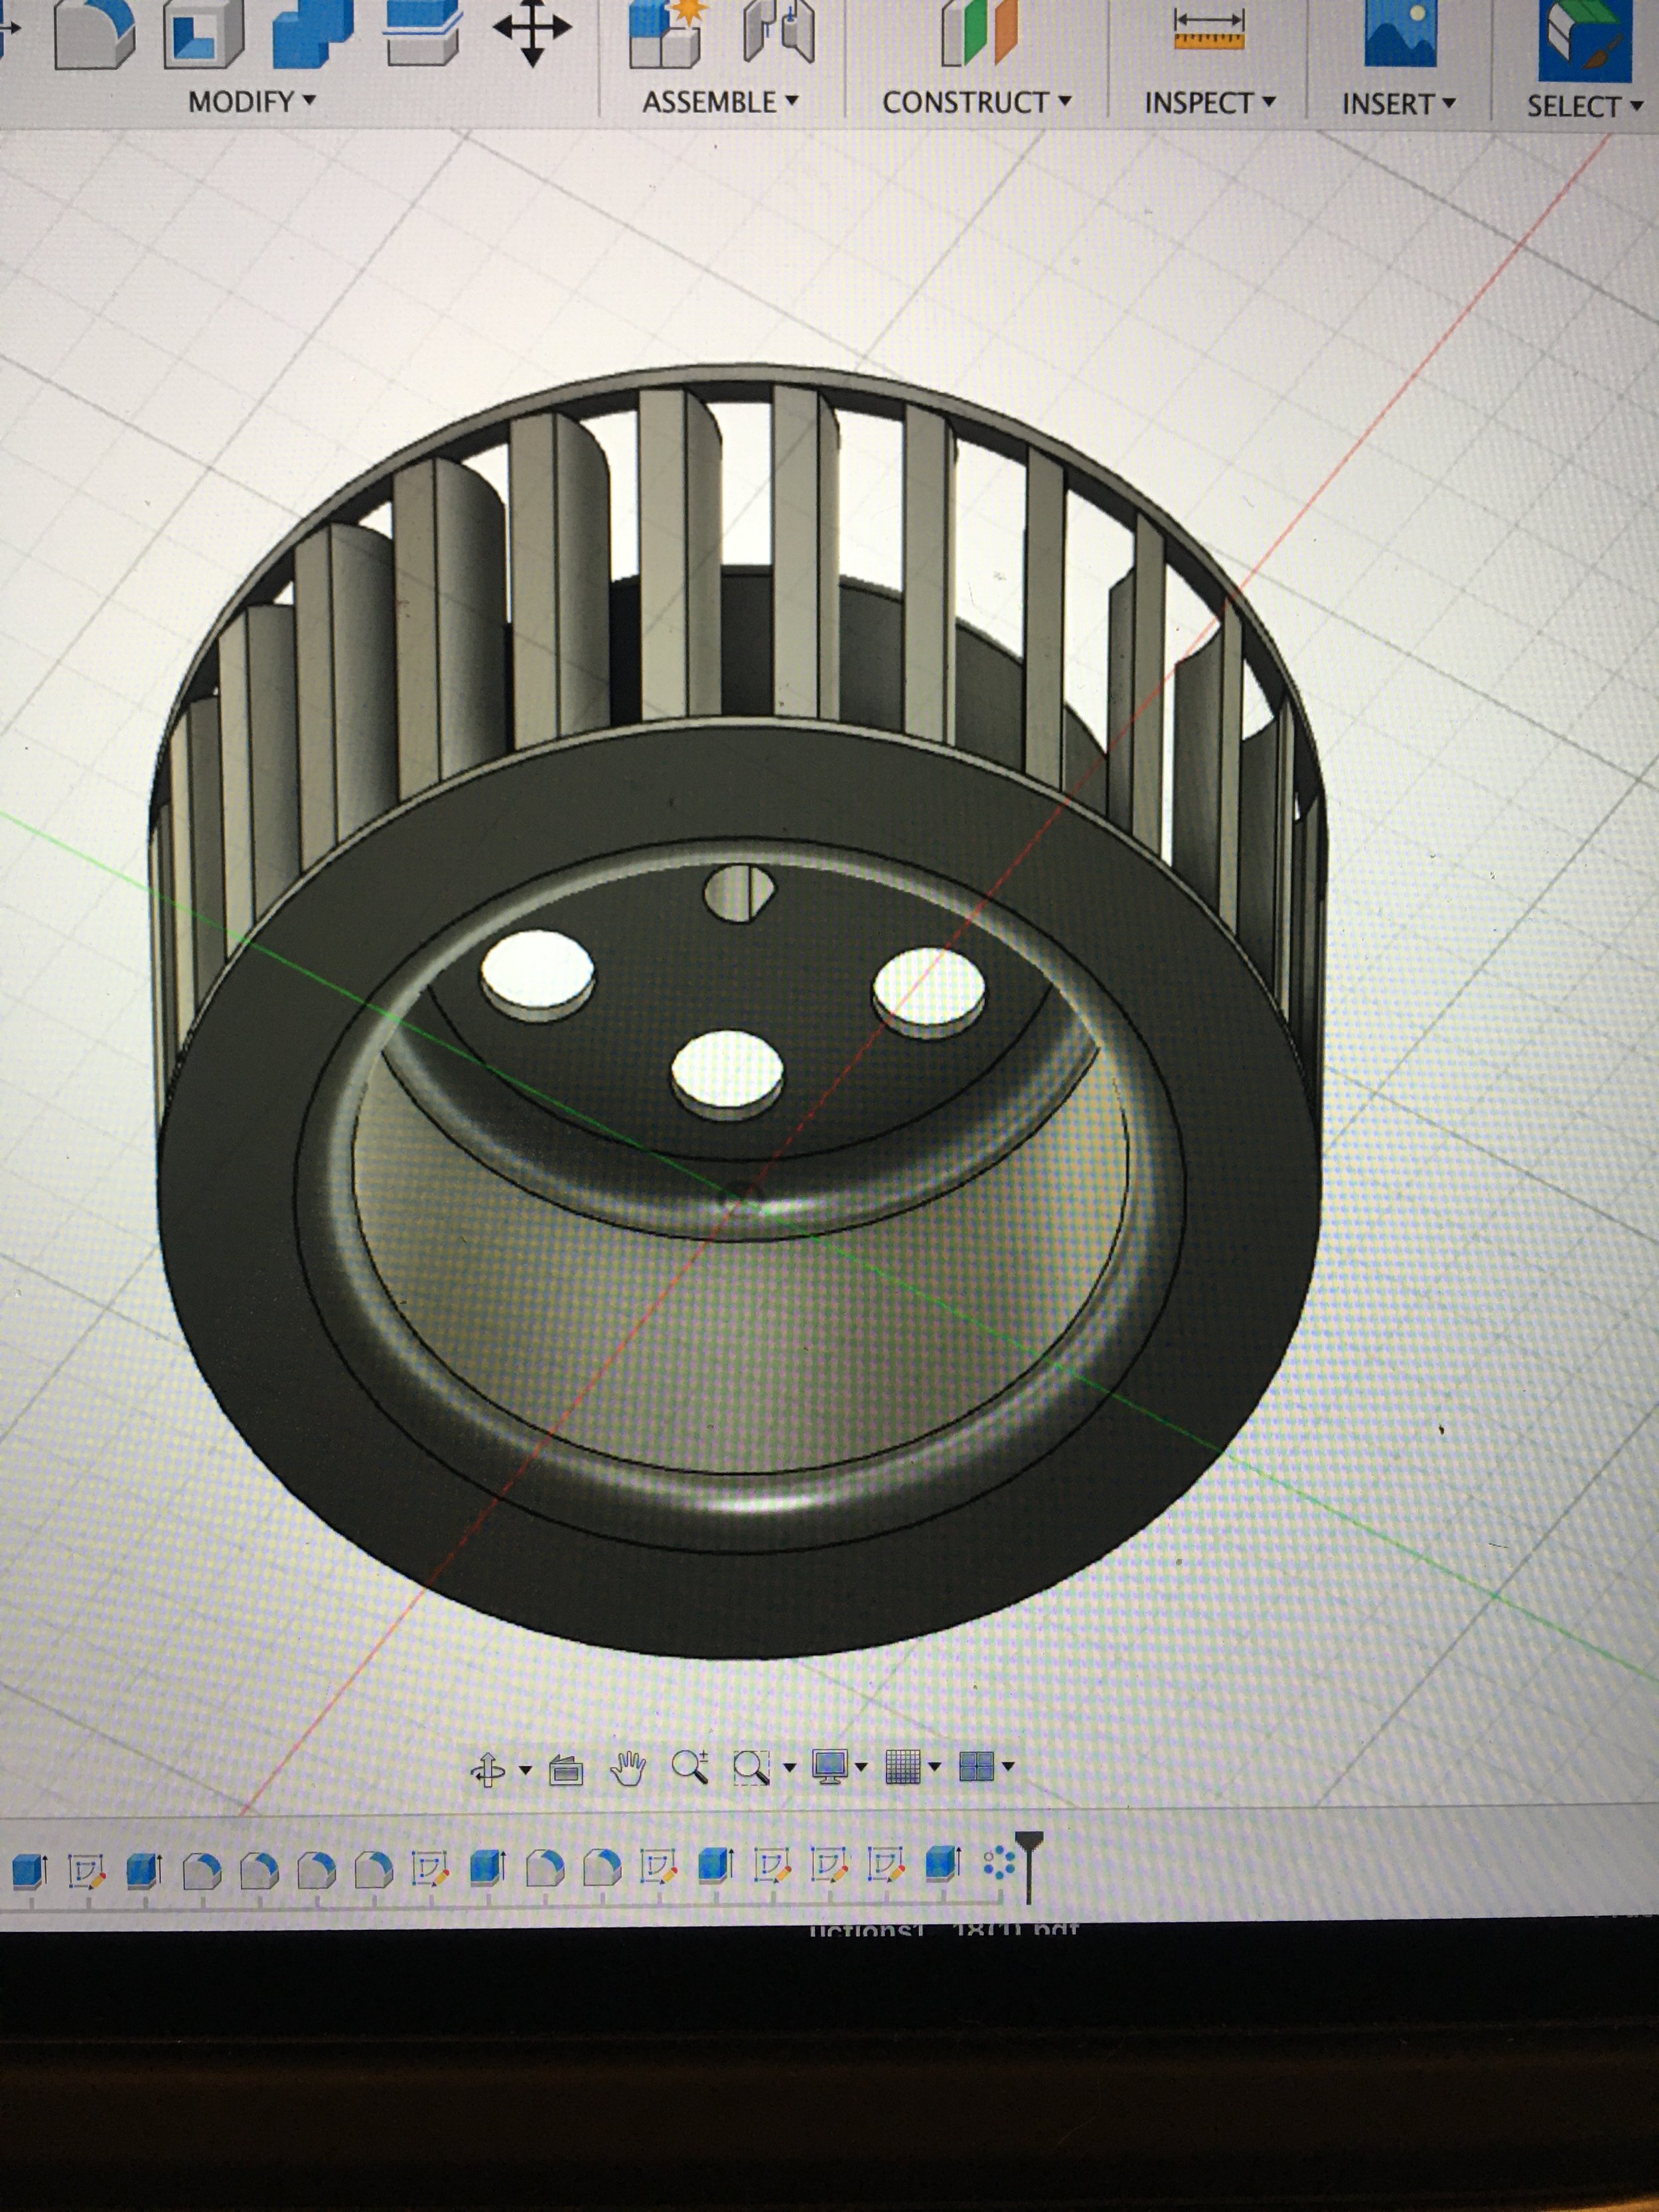

Would it work? Hell if I know. I guessed at the blade angles. The fan count I got from the old metal one that came in the car. The dimensions were also taken from this same fan.
My friend Kevin had performed some heat tests on a filament we used to make a heater vent for a friends van. The Poly Carbon blend filament was able to take heated water up to its boiling point, 212 degrees, before it started to distort. I had hope that the fan would never see this temperature, I know, I’m reaching, so I made the fan out of this same material.

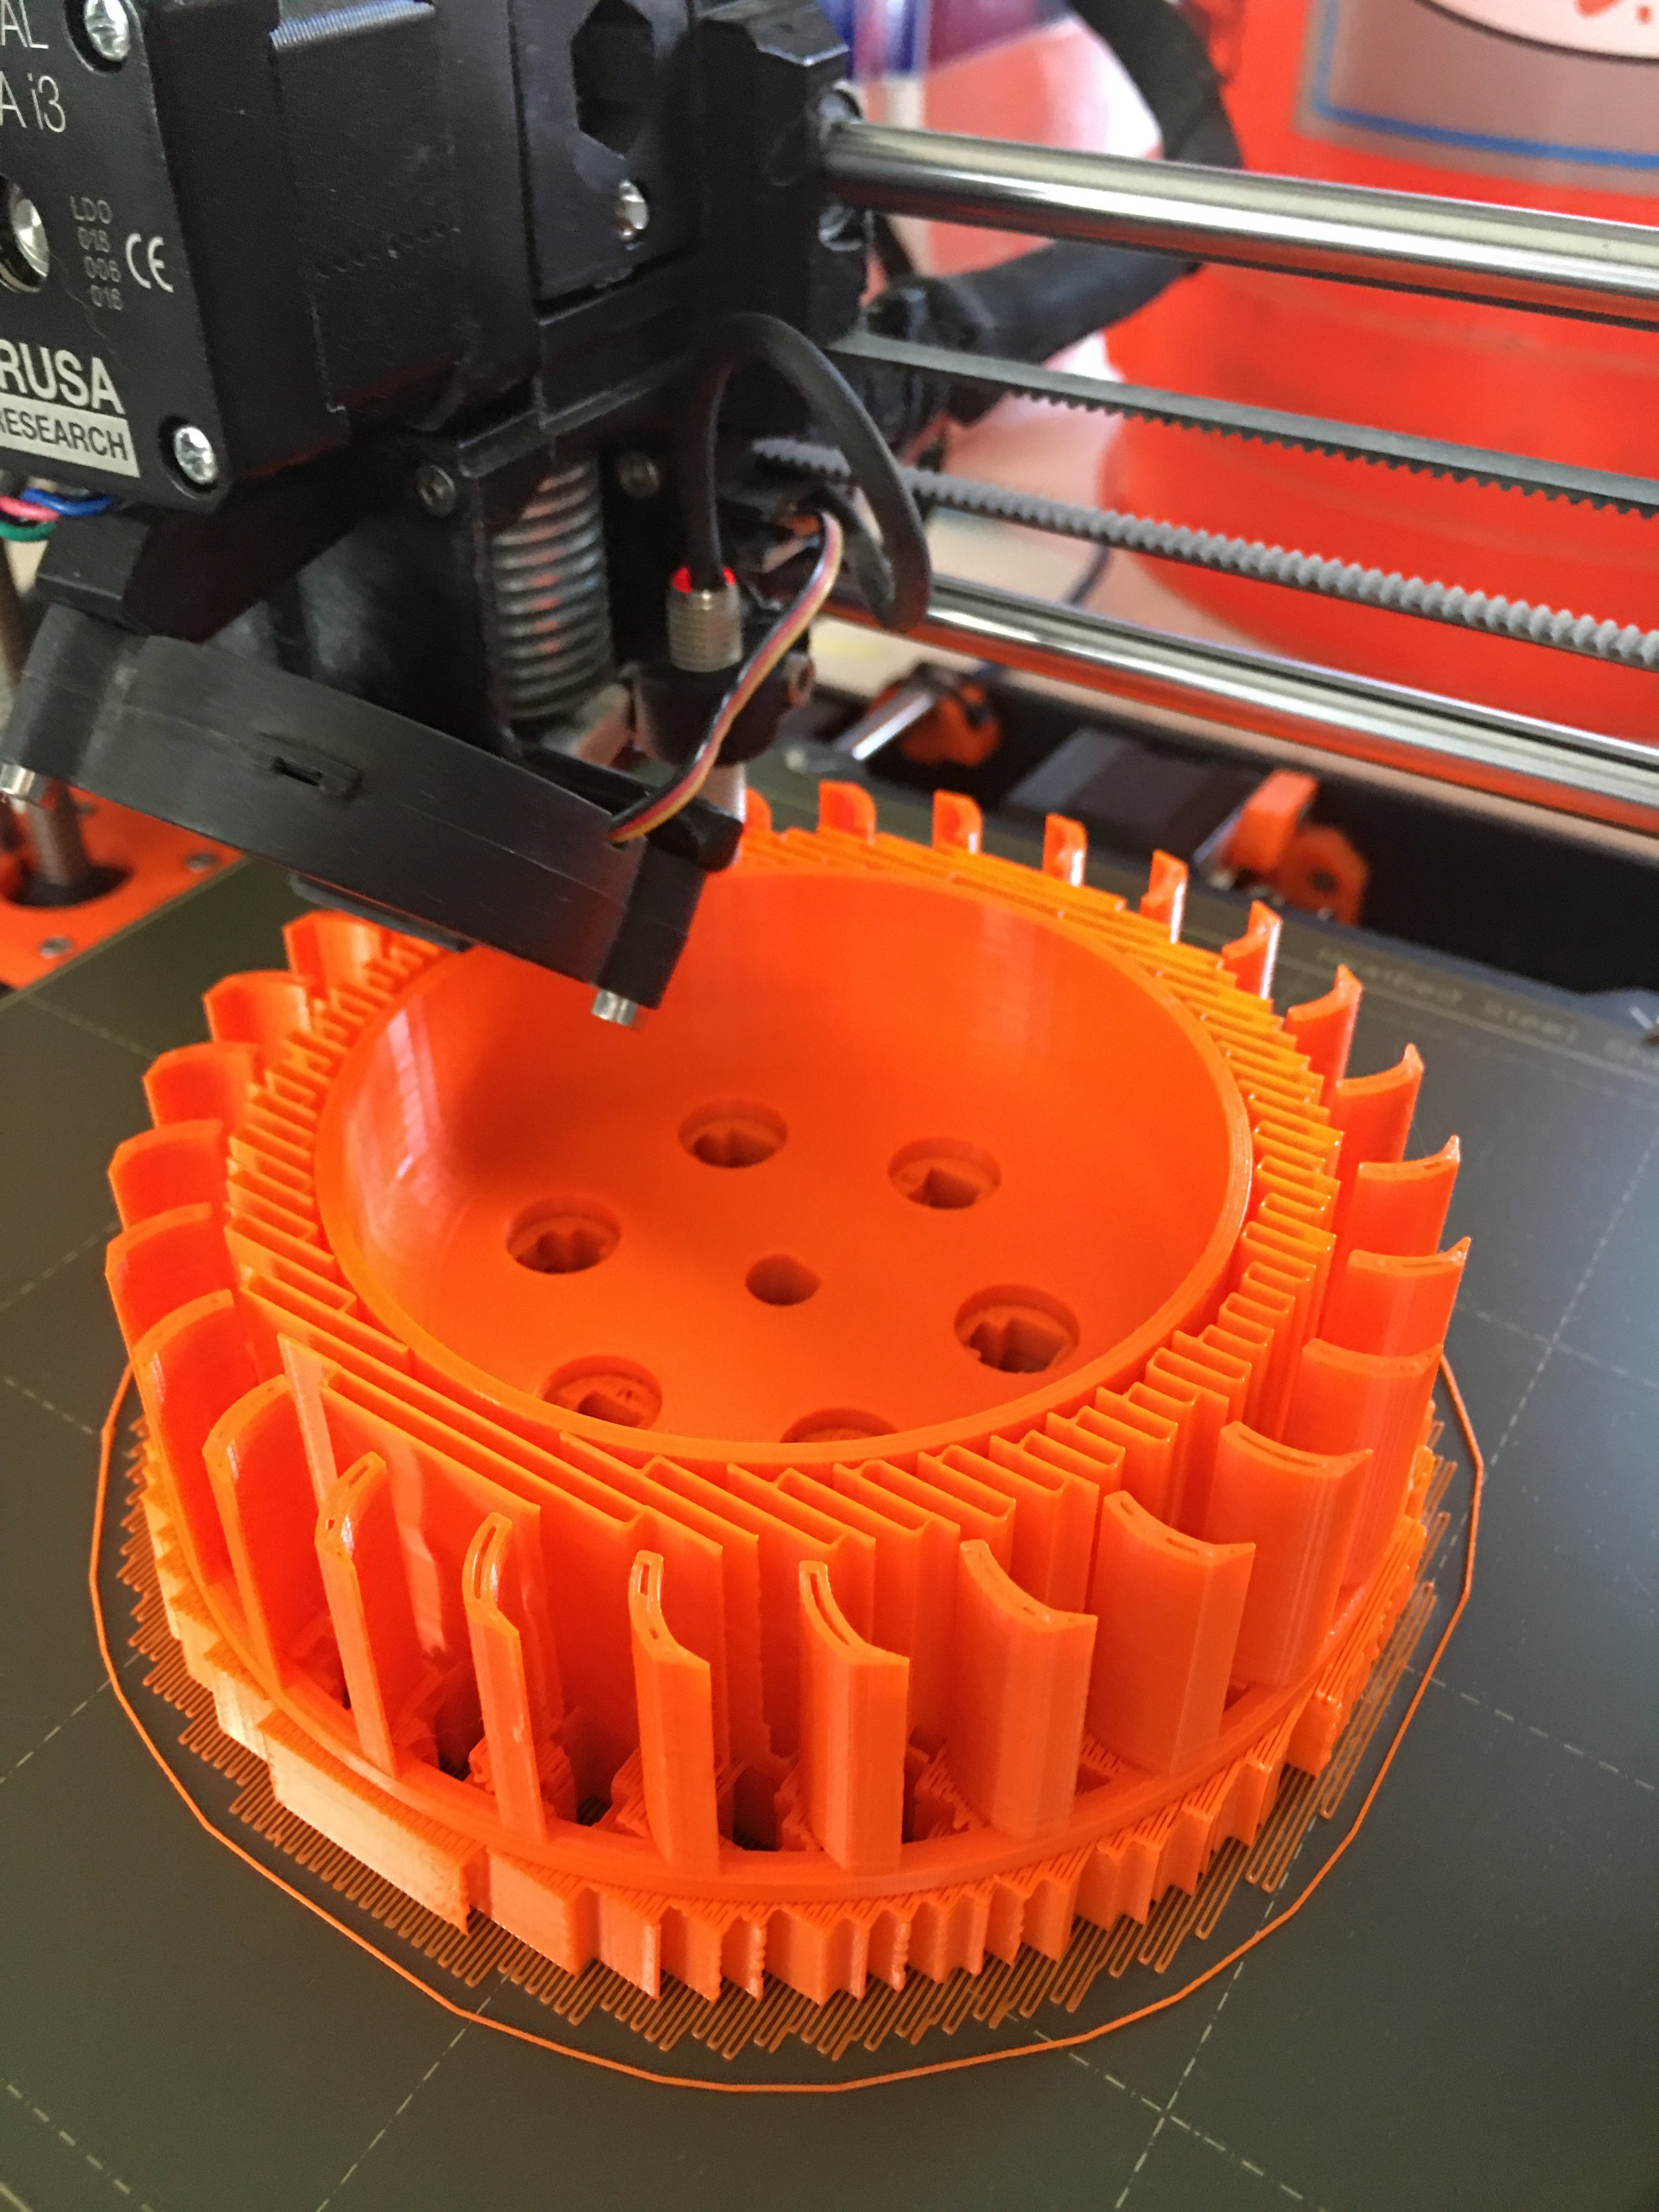

Did I mention I was making this squirrel cage on a 3D printer? I’m sure you figured it out.


and its that time again, test fit!
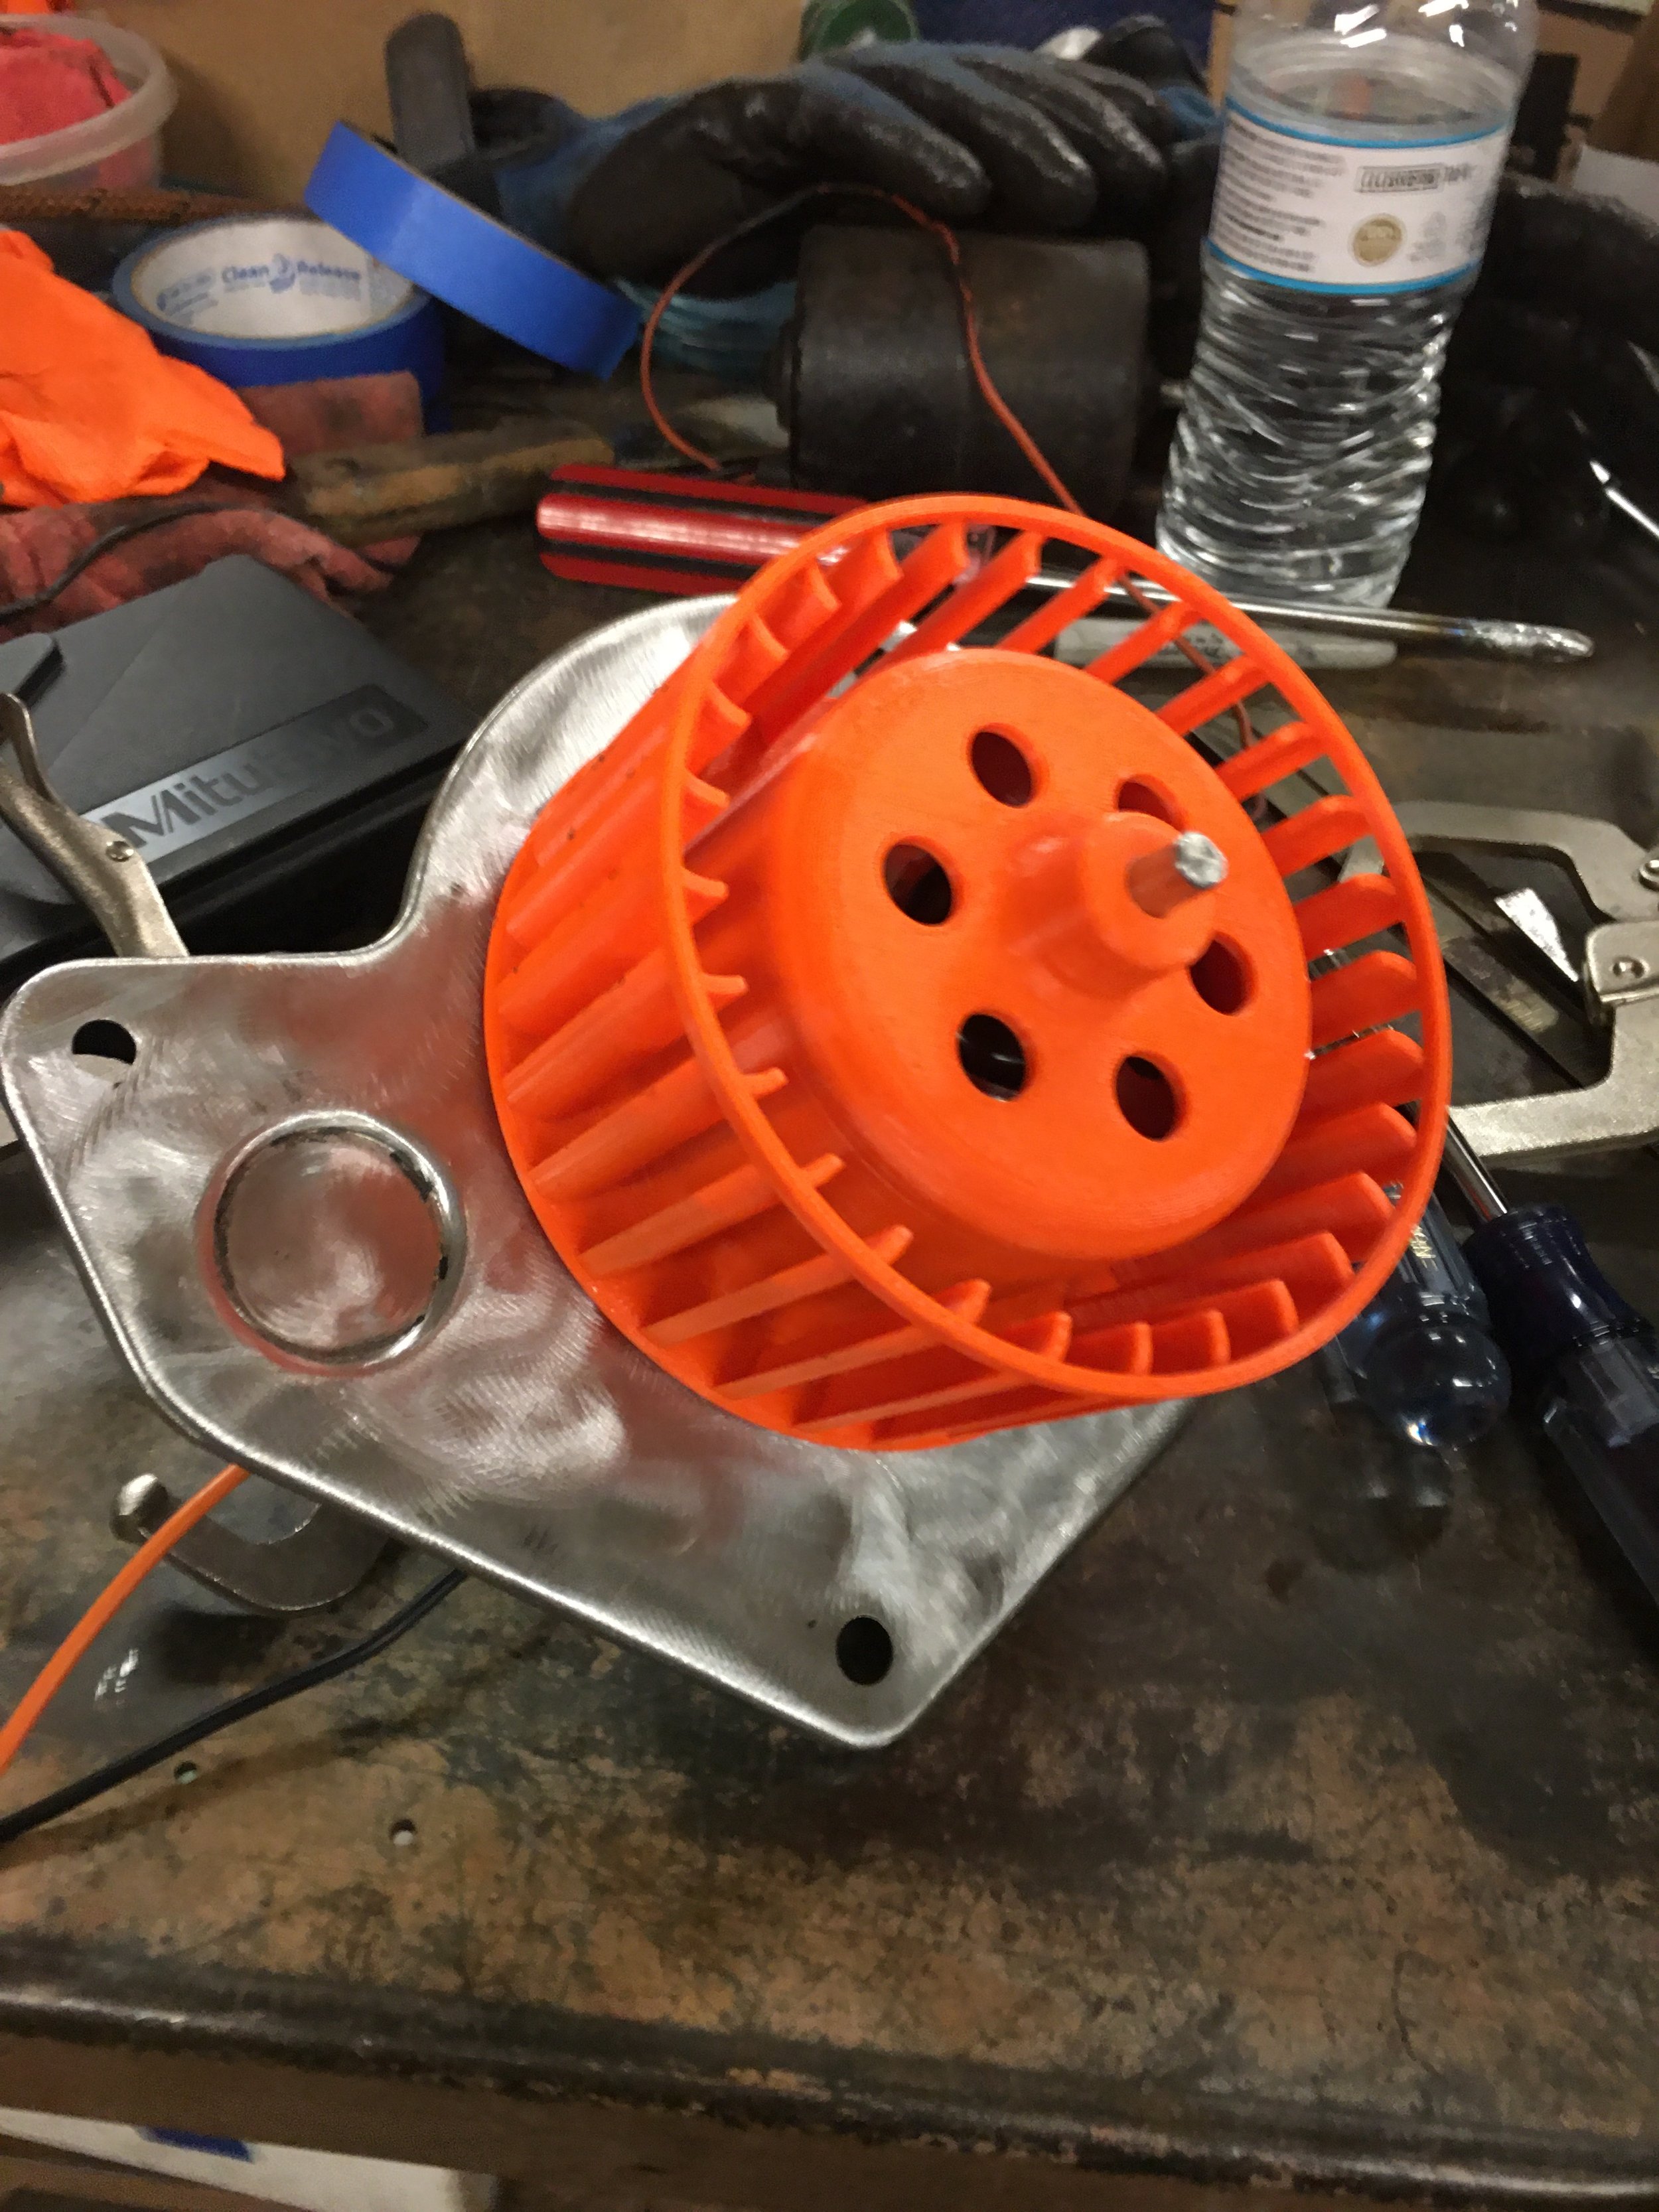

I have a spare car battery sitting around and it was put to use powering this fan assembly. I don’t have any meters to test air flow or even the original set up to compare it to but this kluge was pushing some serious air around. I was surprised.
After the test run, the assembly was taken apart so the mount could be welded completely and then painted black to protect the freshly worked metal.


Out of curiosity, I bolted the fan assembly to the heater box and powered the motor up. The air flow was even stronger when it was channeled properly.
The metal parts of the heater box, half of it is fiberglass, had a coating of rust all over it. I was in an experimenting mood. I used vinegar soaked rags and plastic trash bags and, although it took a few days, the rust was loosened up and the metal was cleaned up pretty well.
The fiberglass tub needs a little work. I haven’t done anything with that yet. When I get closer to working on the interior, that’s when I’ll pull the heater box parts back out again and finish that up.
I now have a fan that fits in the firewall and clears the big ass engine.